

If you want a real challenge, choose expert-level or custom high-detail kits with tiny numbered zones and many close color shades rather than a standard beginner set. That is what separates a hard paint-by-numbers project from a weekend craft. Look for high section counts, subtle tonal gradients, and canvases built from photo-quality source images. Custom conversions and advanced-tier kits from some publishers tend to check every one of those boxes.
TL;DR:
- High section density, numerous near-identical colors, and thin contour lines significantly increase a kit’s difficulty level.
- Comparison of canvas size and color count is crucial, with smaller canvases packed with zones being more challenging even at the same color count.
- Using proper workspace lighting, fine detail brushes, and thinning paint improves accuracy and control on complex projects.
- Custom kits based on personal photos offer maximum control over detail, making them ideal for hobbyists seeking true expert-level difficulty.
- Patience with short, frequent sessions and careful preparation of supplies help maintain motivation and produce better results over weeks-long projects.
Table of Contents
- What Makes a Paint-by-Numbers Kit “Hard”?
- How Do You Pick a Hard Kit That Matches Your Skill Level?
- Setting Up and Painting Highly Detailed Kits
- Why Craftybynumbers’ Advanced Kits Hold Up Under Scrutiny
- How Is Difficulty Actually Labeled and Measured?
- Common Mistakes That Wreck a Hard Kit (and How to Avoid Them)
- Staying Motivated Through a Long, Detailed Project
- What Extra Supplies Improve Precision on Detailed Kits?
- How Do You Protect a Finished Hard Kit’s Fine Detail?
- Ready to Order Your Next Advanced Kit?
- A Realistic Mindset for Tackling a Hard Kit
- Sources
- FAQ
What Makes a Paint-by-Numbers Kit “Hard”?
Marketing labels like “expert” or “advanced” mean nothing on their own. The real difficulty markers are physical and countable, and you can check most of them before you buy.
- Section density. A hard kit crams dozens of tiny numbered zones into a few square inches, especially around eyes, fur, or fine machinery details.
- Color count. Beginner kits typically run under two dozen colors. Genuinely difficult kits have a high color count with many near-identical shades that force you to paint slowly and check the reference constantly.
- Line weight. Thin contour lines that barely separate one number from the next demand a steady hand and often a finer brush than the kit includes.
- Canvas scale versus section size. A small canvas packed with the same number of zones as a large one is harder, because each shape shrinks.
- Supply quality. Thin paint, stiff brushes, or a blurry printed guide will make an already-difficult design harder than it needs to be, regardless of the subject.
Hobbyist communities back this up directly. On the r/paintbynumbers subreddit, enthusiasts actively request “highly detailed, ultra intricate” kits and point each other toward custom or expert-tier designs when a standard kit feels too easy. That community consensus is a useful gut check before you spend money on something labeled “advanced” that turns out to be advanced in name only.
How Do You Pick a Hard Kit That Matches Your Skill Level?
Choosing well matters more than choosing fast. A kit that’s too far beyond your current skill often gets abandoned in a drawer, and one that’s too easy defeats the point of buying a challenging set in the first place.
- Assess the subject matter first. Portraits, wildlife fur, and photorealistic landscapes are far tougher than stylized illustrations or geometric patterns, even at the same canvas size.
- Check the canvas size and color-field count together. A 16x20 inch canvas with 60 colors is a bigger commitment than a larger canvas with fewer colors, because the zones can be smaller and closer together.
- Verify what’s actually included. Confirm the kit has enough paint volume for the section count, a sharp reference photo, brushes suited to fine work, and ideally a varnish or protective topcoat.
- Decide between a produced design and a custom conversion. A custom paint-by-numbers kit built from your own photo gives you full control over how much detail gets converted into paintable zones.
- Set realistic expectations for time and space. Hard kits need a dedicated surface you can leave set up for weeks, not a kitchen table you clear every night.
Pro Tip: Before committing to a large custom piece, order a small test kit in the same style to gauge how your eyes and hands handle that particular density of detail.
Setting Up and Painting Highly Detailed Kits
The workspace matters as much as the kit itself. Weak lighting is the single most common reason a detailed painting looks muddy or uneven once it’s finished, because colors that look distinct under a warm lamp can look nearly identical under daylight. Set up near a window or invest in a daylight-balanced LED lamp, and add a clip-on magnifier or a pair of reading glasses stronger than you think you need. Anchor your canvas to a table or lightweight easel so it doesn’t shift mid-stroke.
Brush choice changes everything on a hard kit. Reserve your finest detail brush, something in the 000 to size 1 range, for zones smaller than a fingernail, and save a slightly larger round for blocking in bigger contiguous shapes. Hold the brush closer to the bristles than you would for broad strokes; it gives you more control at the cost of speed, which is exactly the trade you want on fine work.
Paint handling is where most hard kits go wrong. Acrylics thicken as they sit in the little pots, and thick paint clogs fine lines and obscures printed numbers underneath.
- Thin paint with a drop of water at a time, testing on a scrap edge before committing to a zone.
- Apply two thin coats rather than one thick one for full opacity without losing crisp edges.
- Test any blended color on paper first if a kit runs short on a specific shade.
Work from dark to light and from large shapes to small ones, saving pinpoint highlights for the very end. That order keeps you from painting yourself into a corner where a tiny zone is surrounded by four different wet colors. Ways to improve painting accuracy covers additional line-control techniques worth reviewing before you start a large piece. If you slip outside a line, let the paint dry completely, then correct it with a fine liner brush loaded with the surrounding color rather than trying to fix it wet.
Pro Tip: Keep a damp (not wet) paper towel nearby to wipe your brush between color changes. A brush with even a trace of the previous color will muddy a subtle shade shift, and subtle shade shifts are exactly what make hard kits.
Why Craftybynumbers’ Advanced Kits Hold Up Under Scrutiny
Craftybynumbers has built its catalog around the difficulty markers that actually matter, backed by a large customer base. That scale means the kit contents, pre-printed canvas, matched acrylic paints, and detail brushes, have been tested across a wide range of skill levels and subjects, not just designed on paper.
Custom conversions are where the difficulty ceiling really rises. Turning your own photo into a paint-by-numbers kit lets the conversion process preserve fine gradients, skin tones, and fur texture that a pre-designed stock image often smooths over. That level of control is something hobbyists who seek highly detailed kits often request in community forums when standard kits feel too simple.
Three product types map directly onto the difficulty signals covered earlier:
- Custom Paint by Numbers converts your own high-resolution photo into a kit, giving you direct control over subject complexity and color count. This is the highest-difficulty option because you choose exactly how demanding the source image is.
- Extra Painting functions as an add-on or expanded-palette kit built for hobbyists who want more color complexity than a standard set offers.
- Vintage Car is a themed, display-oriented design that combines fine linework (chrome, reflections, tire detail) with a subject substantial enough to reward hours of work.
How Is Difficulty Actually Labeled and Measured?
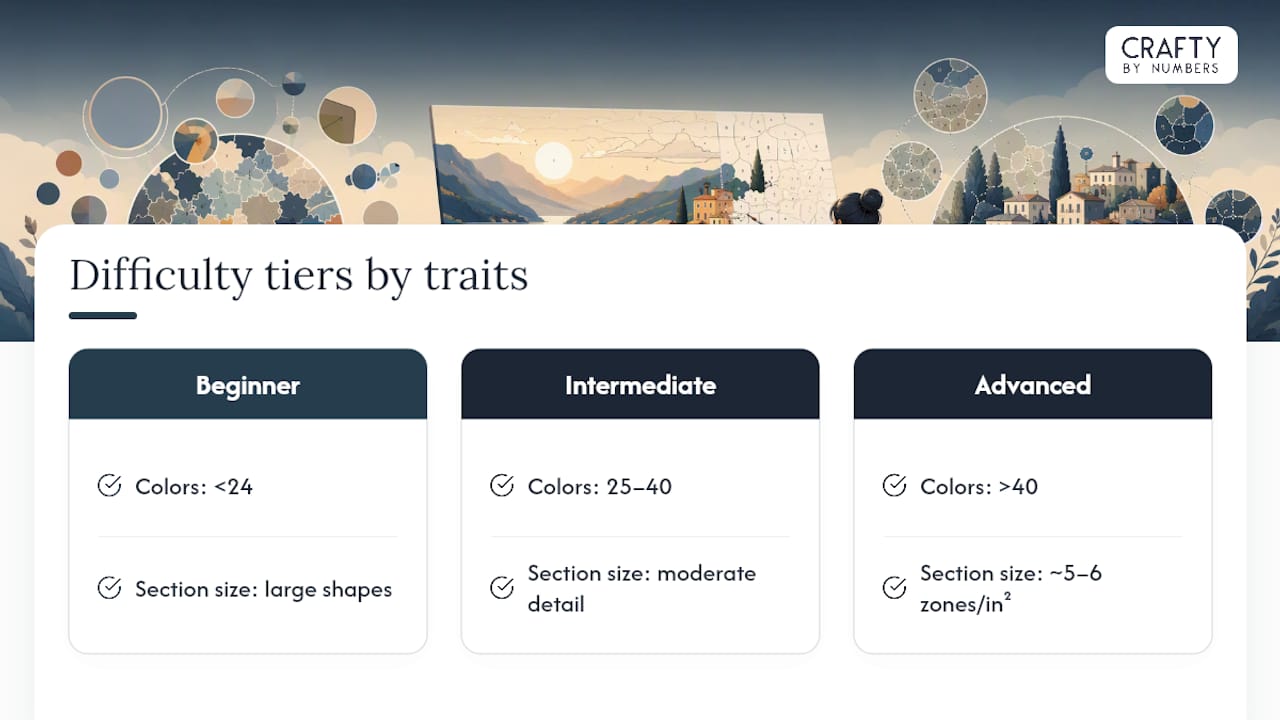
Publishers rarely agree on what “expert” means, which is why the label alone shouldn’t be your deciding factor. Craftybynumbers breaks difficulty into tiers based on measurable traits rather than a single vague word, detailed further in its paint by numbers difficulty level guide. The tiers generally track three variables at once: canvas size, the total number of distinct color fields, and how small the average section gets.
A kit marketed as “beginner” typically stays under 24 colors with large, simple shapes. “Intermediate” kits push into the 25 to 40 color range with moderate detail in faces or foliage. “Advanced” or “expert” kits regularly exceed 40 colors, and the section sizes shrink enough that a single square inch of canvas might contain five or six separately numbered zones.
Canvas size complicates this further. A 30x40 inch expert kit gives your fine details more physical room to breathe, even at a high section count, while a compact 12x16 inch kit with the same number of zones is objectively tougher because there’s less physical space per shape. When you’re comparing two kits labeled identically as “advanced,” check the section count relative to canvas size before assuming they’re equally hard.
Custom kits sidestep labeling inconsistency entirely, since difficulty scales directly with how much detail you allow into the source photo conversion. That’s part of why forum communities so often point newcomers toward custom options when a labeled “expert” kit turns out to be underwhelming.
Common Mistakes That Wreck a Hard Kit (and How to Avoid Them)
The most frequent failure point isn’t skill, it’s sequencing. Painters often start wherever looks interesting rather than working systematically, which leads to wet paint smearing into adjacent zones and colors drying before you’re ready to blend an edge.
Rushing thin lines is the second-biggest issue. A loaded brush dragged too fast across a narrow zone will bleed over the printed number, and once that number disappears you’re guessing at colors for the rest of the shape. Slow down specifically around any zone narrower than your brush tip, and consider a fresh brush cut down to a finer point for those areas.
Color confusion piles up fast on high-count kits. When two paint pots look nearly identical, painters frequently grab the wrong one and don’t notice until they’ve covered several zones. Label your paint pots with the printed number using a small sticker or marker as soon as you open the kit, before the labels wear off from handling.
Skipping the “let it dry” step causes muddy transitions more than any other single habit. Acrylics dry fast, usually within 15 to 20 minutes, but painters eager to finish a section often paint an adjacent zone before the first one has fully set, and the two colors bleed together at the seam.
Finally, running out of a specific paint color mid-project is common on kits with 40 or more shades, since manufacturers allocate volume based on estimated coverage per zone, and estimates aren’t always generous. If you’re running low, thin the remaining paint slightly rather than stretching it too far, and save any touch-up work for last when you can judge exactly how much you need.
Staying Motivated Through a Long, Detailed Project
A large expert kit can take weeks, and momentum, not talent, is usually what determines whether it gets finished. Treat it like a habit rather than a single sitting.
Short, frequent sessions keep your hand steady and eyes fresh, while very long sessions often end with rushed, sloppy work as fatigue sets in.
Break the canvas into visual milestones instead of thinking about it as one enormous task. Finishing an entire face, a full background, or one quadrant gives you a concrete sense of progress that “50% done” on a section counter never quite delivers.
Keep the canvas visible between sessions rather than storing it away. A piece propped on a shelf or easel in view acts as a quiet reminder and lowers the friction of picking it back up.
If motivation stalls hard, switch to the most tedious remaining section during a burst of focus, and save the more enjoyable detail work, like eyes or highlights, for when your energy is lower. That way the boring parts get done while you have patience for them, and the rewarding parts happen when you need a motivational boost.
Treating the whole project as a screen-free wind-down ritual rather than a chore also helps; the case for paint by numbers as a digital detox activity applies just as much to a demanding kit as an easy one.
What Extra Supplies Improve Precision on Detailed Kits?
The kit’s included brushes handle most standard work, but a few added tools noticeably raise your ceiling on fine detail. A liner brush, sized 000 or smaller, is the single most useful addition for hard kits, since it lets you correct thin lines and paint zones smaller than the included brushes can comfortably reach.
A stay-wet palette or a simple damp paper towel under your paint pots keeps acrylics workable longer during long sessions, since the pots that come with most kits dry out faster than a dedicated palette would. A bottle of matte or gloss acrylic medium lets you thin paint without diluting its pigment strength the way plain water eventually does at higher ratios.
Magnification tools matter more than most first-time buyers expect. A clip-on lamp magnifier or a simple headband loupe, the kind used for jewelry repair, makes a real difference on any zone smaller than a pencil eraser. Painters who skip this step often report eye strain well before the canvas is half finished.
A fine detail liner pen in black, used sparingly, can sharpen contour lines that got softened by two coats of paint, though this works best as a final pass rather than a mid-project habit. Finally, a small artist’s palette knife helps mix custom shades when a kit runs short on a specific color, letting you blend from two adjacent pots rather than guessing at a substitute straight from the tube.
How Do You Protect a Finished Hard Kit’s Fine Detail?
A hard kit represents real hours of work, and the finishing steps matter as much as the painting itself. Let the canvas cure fully before doing anything else, ideally 48 to 72 hours, since acrylic paint continues to harden well after it looks dry to the touch.
Sealing is non-negotiable on detailed pieces. A thin coat of acrylic varnish, applied with a wide soft brush in one direction, protects fine linework from dust, UV fading, and accidental smudging over the years. Choose a matte varnish if you want the piece to read as a painting rather than a print, since a high-gloss finish can create glare that actually obscures subtle tonal work under indirect light.
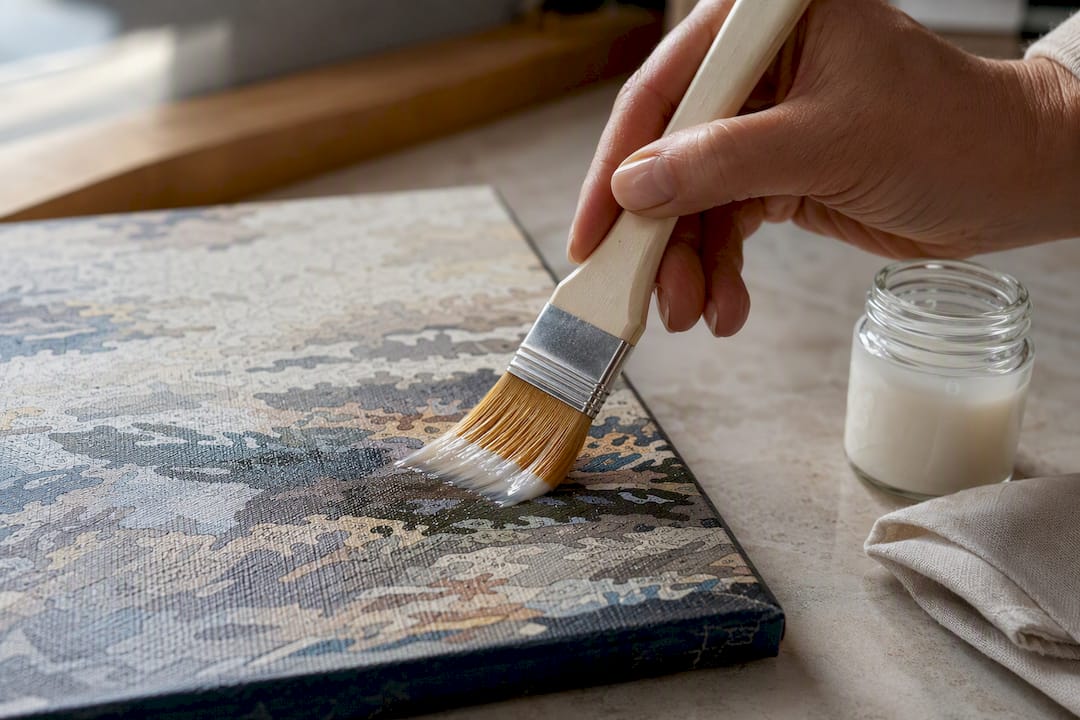
Framing changes how forgiving the piece looks. A mat or float frame that adds a small gap between the canvas edge and the frame border draws attention away from any minor imperfections near the edges, which is common on hand-painted work regardless of skill level. Avoid pressing glass directly against a freshly varnished surface, since trapped moisture can cause the varnish to cloud over time.
Store any unfinished sessions rolled loosely with the painted side out, never folded, since a crease across a section with fine detail is nearly impossible to fully smooth back out. Once framed, hang the piece away from direct sunlight and heating vents, both of which accelerate color fading in acrylics faster than most people expect.
Ready to Order Your Next Advanced Kit?
Once you know what “hard” actually looks like, choosing the right kit gets a lot easier. For a first serious challenge, the Custom Paint by Numbers kit gives you the most control: upload a high-resolution photo, ideally a portrait or a subject with strong tonal variation, and the conversion process builds a canvas whose difficulty matches exactly how much detail you want to take on. If you’d rather start with something already designed, Extra Painting offers an expanded color palette for hobbyists who’ve outgrown standard kits, and Vintage Car delivers a display-worthy subject with the kind of chrome and reflection detail that rewards patient, careful work.
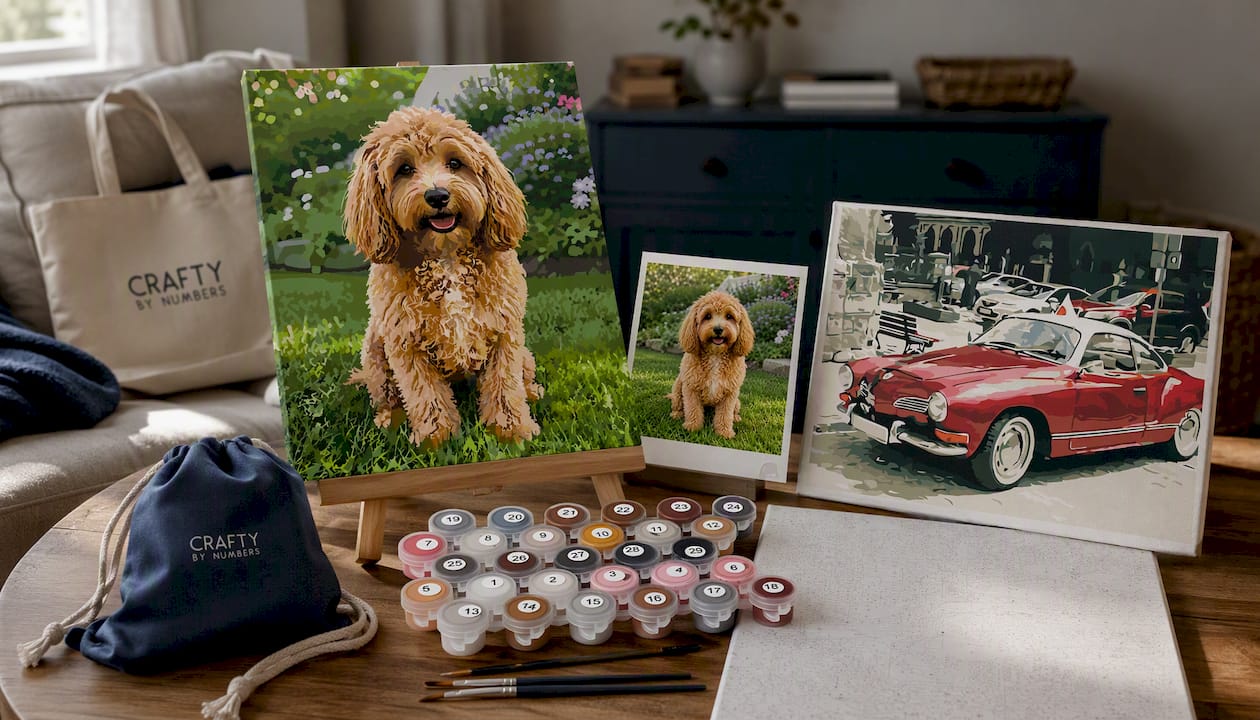
Ordering a custom kit takes a few minutes: upload your photo, choose your canvas size, and let the conversion tool map out the color fields. From there, add a fine liner brush and a clip-on magnifier to your cart if the kit’s included brushes don’t already cover the smallest zones. A practical starter plan for a first hard kit looks like this: commit to 20 to 30-minute sessions four or five times a week, keep a simple checklist of supplies (paint pots labeled, brushes cleaned, varnish on hand for the end), and expect a large custom piece to take several weeks rather than days. Every kit still ships with the pre-printed canvas, matched acrylic paints, and detail brushes that over 120,000 customers have relied on, so the core supplies are already covered before you add anything extra. Head to the Custom Paint by Numbers page to start your conversion today.
A Realistic Mindset for Tackling a Hard Kit
Progress on a genuinely difficult kit is slow by design, and that’s not a sign you’re doing it wrong. Plan for short, near-daily sessions instead of rare long ones. It keeps your hand steady and turns a months-long project into a manageable habit rather than a looming task.
Don’t underestimate the relaxation side of this either. The same stress-relief benefits that make easy kits popular apply just as strongly to hard ones, arguably more, since the sustained focus a detailed canvas demands is exactly what pulls your mind away from everything else.
— Paula S.
FAQ
What Counts as the Highest-Quality Paint by Numbers Kit?
Quality comes down to canvas printing sharpness, paint pigment strength, and brush quality included in the box. Kits with pre-printed canvases, matched acrylic paints, and detail brushes, like those Craftybynumbers ships, give you the supplies needed to actually execute a high-detail design rather than fighting the materials.
Is Painting by Numbers Difficult?
It depends entirely on the kit. A beginner set with under 24 colors and large shapes is genuinely easy, while an expert or custom kit with 40-plus colors and tiny numbered zones can take weeks of patient, focused work.
What Is the Hardest Paint to Use on a Detailed Kit?
Thick, under-thinned acrylic is the hardest to control on fine work, since it clogs small zones and obscures printed numbers. Thinning paint slightly with water or an acrylic medium and applying two thin coats gives far better control on detailed sections.
0 commentaire