


The highest-impact ways to improve painting accuracy in a single paint-by-numbers session come down to six habits: run a quick squint test to check your value structure, mix colors on a neutral gray spot, use a simple grid or reference points for proportions, work from large shapes to small details, match your brush size to the numbered area, and step back several feet every few minutes to reset your eye. None of these require art school. All of them work on your first try.
Your session-start checklist:
- Squint at your reference and canvas to compare light/dark masses
- Set aside a neutral gray area on your palette for test swatches
- Sketch or confirm proportions with a grid or reference points before painting
- Block in the largest color areas first
- Switch to a smaller brush when you reach tight or small numbered zones
- Step back several feet after every major section
Pro Tip: Take a photo of your canvas and convert it to black-and-white on your phone before you start painting. That grayscale image becomes your value map for the whole session.
Table of Contents
- What tools and workspace setup actually help you paint better?
- How do you check values and color accuracy while you paint?
- What measurement methods keep your shapes and proportions true?
- How does brush handling affect edge control and small details?
- How do you fix mistakes and finish a paint-by-numbers piece cleanly?
- Short drills that build steadier hands and sharper observation
- A repeatable session workflow you can follow every time
- Key Takeaways
- Why these methods work for relaxed hobby painters
- The right brushes make every accuracy method easier
- FAQ
What tools and workspace setup actually help you paint better?
Good lighting is the single most underrated accuracy tool. A daylight-balanced lamp (5000–6500K) shows colors as they really are. Mixed light sources, like a warm overhead bulb combined with cool window light, shift your color perception and make matching harder than it needs to be.
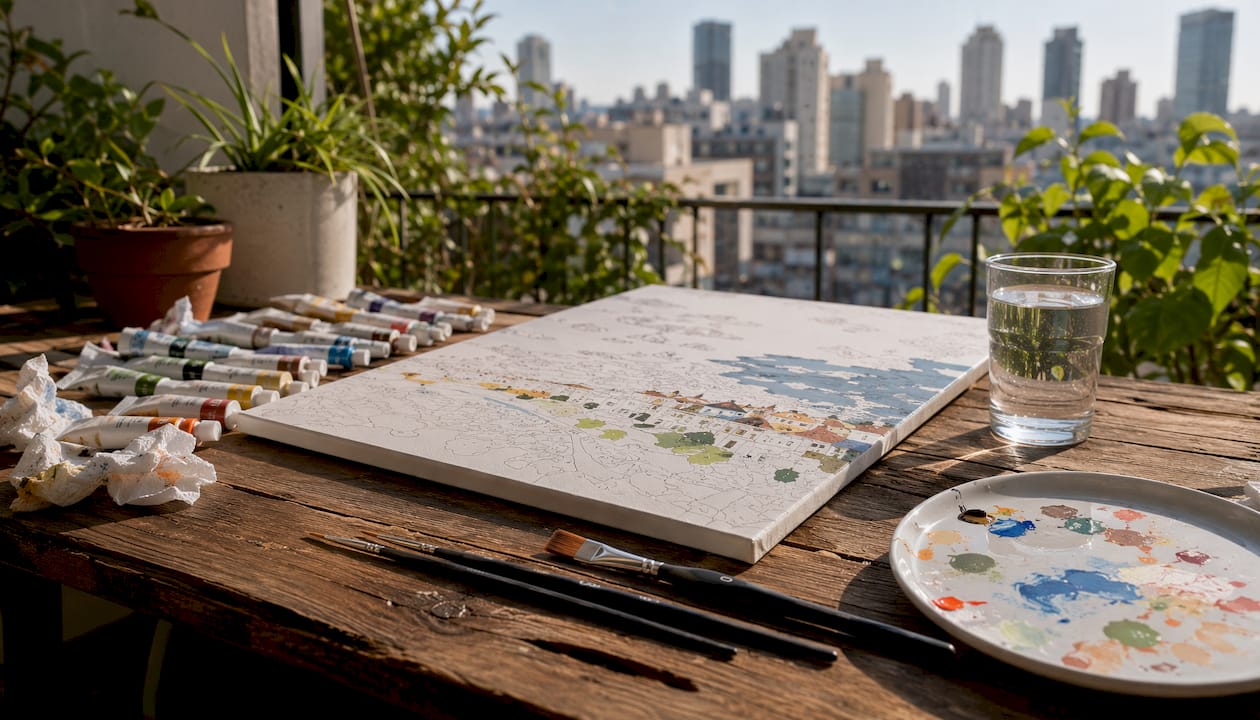
Beyond lighting, a stable surface matters more than most hobbyists expect. A flat table or a small easel keeps your canvas from shifting mid-stroke. Leave enough room to step back frequently to 6–8 feet, which resets your visual focus and prevents the tunnel vision that causes proportion drift.
Brush selection by task:
- Edge work and tiny numbered zones: Precision Detail Brushes (Set of 10) — small-diameter tips that stay inside the lines without effort
- Mid-size fills and general strokes: Premium Paint Brushes (Set of 10) — versatile enough to switch between detail and broader areas
- Larger block-ins and smoother coverage: Professional Brushes — built for controlled, even strokes across bigger sections
Swapping to a precision detail brush for a small numbered area takes three seconds and keeps the relaxing flow of the session intact. You don’t need to stop and think; just pick the right size and keep going.
Key insight: Your palette surface color changes how you see a mixed color. A white palette makes every tint look darker than it is. A neutral gray surface lets you judge hue, saturation, and value without the optical contrast illusion that white creates.
Pro Tip: Cover half your palette with gray craft paper or use a gray ceramic tile as your mixing area. Test every mixed swatch there before it touches the canvas.
How do you check values and color accuracy while you paint?
Values matter more than exact hue for a convincing painting. Get the lights and darks right, and small color mismatches become nearly invisible. Get them wrong, and even perfect color looks flat.
Squint test, step by step:
- Squint hard at your reference until details blur and only major light/dark masses remain.
- Squint at your canvas the same way.
- Compare: do the dark masses sit in the same places? Are the lightest areas equally bright?
- If something looks off, that area needs a value adjustment before you add more detail.
The grayscale test works alongside the squint test. Photograph your canvas, then convert the photo to black-and-white using your phone’s built-in filter or any free photo app. Compare that image to a grayscale version of your reference. Use a 1–10 value scale (1 = white, 10 = black) to name the value of each major area and confirm they match.
For color mixing, test every swatch on a neutral gray surface under consistent light before committing to the canvas. Gray prevents the optical contrast shift that makes a color look right on a white palette but wrong once it’s surrounded by other hues.
Value check: Artists use a 1–10 value scale to compare painting values against the reference during the painting process — a diagnostic tool that catches errors before they compound.
Pro Tip: Convert your reference photo to grayscale at the start of the session and keep it open on your phone beside the canvas. Glance at it every time you mix a new color.
What measurement methods keep your shapes and proportions true?
The grid method removes proportion guesswork and has been used by professional artists for centuries. For paint-by-numbers, it’s most useful on complex areas like portraits or oversized canvases where the printed numbers alone don’t give you enough spatial context.
How to use a basic grid:
- Draw equal squares over a printed copy of your reference (or use a digital grid app).
- Draw the same number of rows and columns on your canvas in light pencil or charcoal.
- Label rows with numbers and columns with letters (A1, B2, etc.) on both surfaces.
- Copy shapes one square at a time, focusing on where lines intersect the grid edges, not on what the object “is.”
- Every 3–4 squares, step back and check overall proportions from a distance.
- Erase grid lines before painting, or use the string-and-pushpin method to keep a floating grid above the canvas surface.
Lighter alternatives work well for simpler sections. Pick two or three reference points (a corner of an eye, the edge of a horizon line) and measure their distance from the canvas edge with your brush handle or a finger width. Diagonal measurements and negative-space checks (focusing on the background shapes between objects) catch proportion errors without any drawing at all.
Pro Tip: Use the string-and-pushpin grid method to avoid permanent pencil marks. Strings float about ¼ inch above the canvas, your brush moves freely underneath, and you can remove the grid at any point without erasing.
How does brush handling affect edge control and small details?
Edge control comes down to two things: brush size and paint consistency. Match the brush diameter to the smallest numbered area you’re filling, and thin your acrylic paint just enough that it flows smoothly without bleeding under the printed lines.
For acrylics, a creamy consistency (roughly the texture of yogurt) covers cleanly in one or two passes. Too thin and the paint seeps; too thick and it drags and lifts the layer beneath. Add water in tiny amounts, test on scrap paper, and adjust before touching the canvas.
Brushstroke techniques for cleaner edges:
- Short controlled strokes: Pull from the center of a shape outward toward the edge, stopping just before the line.
- Anchor-and-roll: Rest the side of your hand on the canvas for stability, then roll the brush tip along a curve for smooth arcs.
- Tip-loading for dot work: Load only the very tip of a detail brush, then press and lift straight up for clean dots in tiny areas.
For transitions between adjacent colors, apply a thin glaze of the lighter color over the dried edge of the darker one. Feathering the glaze with a nearly dry brush softens the boundary without reworking the whole section. Check out how to paint small details for more on keeping fine areas clean.
Edge control reality: The brush is only half the equation. A brush that’s overloaded with paint will bleed no matter how steady your hand is. Wipe excess paint on a paper towel before every stroke near a boundary line.
Pro Tip: Keep a damp cloth beside your palette and wipe your brush between colors. A clean brush tip gives you a sharper edge than any technique adjustment.
How do you fix mistakes and finish a paint-by-numbers piece cleanly?
Fix errors in the right order and you save yourself from repainting large sections. The sequence: proportion and shape first, then value, then color, then edges, then varnish.
Step-by-step correction routine:
- Photograph the canvas and convert to grayscale to diagnose value problems objectively.
- Correct any shape or proportion errors while the paint is still thin, using a damp brush to lift wet acrylic or a light coat of white to cover a dry mistake.
- Adjust values before touching color: a too-dark area needs a lighter glaze, not a different hue.
- Clean edges with a fine detail brush loaded with the adjacent color.
- Add final highlights and deepen shadows to increase contrast where needed.
- Apply a thin varnish coat once the painting is fully dry (acrylic layers are typically dry to the touch in 20–30 minutes, but wait at least 24 hours before varnishing).
When to stop fixing:
- A small edge wobble that reads correctly from 3 feet away? Leave it.
- A value that’s one step off in a background area? Leave it.
- A shape that’s visibly wrong in the focal point of the painting? Fix it.
The goal of paint-by-numbers is enjoyment first. Reworking an area that only you can see at close range costs more in relaxation than it gains in polish. For a full finishing walkthrough, the tips for finishing your masterpiece guide covers varnishing and final touch-up steps in detail.
Pro Tip: Before varnishing, photograph the finished piece and view it at thumbnail size. Proportion and color errors that are invisible at full size often show up clearly when the image is small.
Short drills that build steadier hands and sharper observation
Ten minutes of focused practice before a session pays off faster than an hour of unfocused painting. These drills use leftover paint and scrap canvas, so there’s no pressure and no waste.
Practice drill list:
- Controlled line fill: Fill a narrow strip between two pencil lines without touching either edge. Repeat with progressively thinner strips.
- Edge tracing: Trace the outline of a printed shape on scrap paper with a detail brush. Focus on consistent pressure.
- Value-block thumbnails: Paint three 1-inch squares in light, mid, and dark values of one color. Match them to a 1–10 scale.
- Negative-space sketching: Instead of drawing an object, draw the background shapes around it. This stops the brain from labeling and improves outline accuracy.
- Dot-and-line accuracy drill: Place ten dots in a straight line freehand, then connect them. Check alignment with a ruler.
- 5-minute squint warm-up: Squint at your reference for 30 seconds, then paint the major light/dark masses from memory on scrap canvas.
Pro Tip: Use leftover paint from your kit for all drills. It keeps the practice low-stakes, matches the exact consistency you’ll use on the real canvas, and uses up paint that would otherwise dry out.
A repeatable session workflow you can follow every time
A consistent session order prevents the most common accuracy mistakes: painting details before values are set, or finishing edges before shapes are confirmed.
Session workflow:
- Setup (5 minutes): Arrange lighting, set out brushes by size, fill the gray mixing area, and open your grayscale reference on your phone.
- Value check (5 minutes): Squint at the reference, identify the three darkest and three lightest areas, and note them before touching paint.
- Block-in (15–30 minutes): Fill the largest color areas first using your professional or premium brush. Keep paint consistency creamy, not watery.
- Refine shapes (15–20 minutes): Check proportions with a reference point or grid check. Correct any shape issues now, before detail work.
- Detail and edges (15–30 minutes): Switch to a precision detail brush for small numbered zones. Work from the focal point outward.
- Finish (10 minutes): Add final highlights, deepen key shadows, clean stray edges, and photograph the result for a grayscale check.
Session checklist to pin by your easel:
- Daylight lamp on, palette gray area ready
- Grayscale reference open on phone
- Largest shapes blocked in before any detail
- Step back every several minutes
- Detail brush for any area smaller than your thumbnail
- Photo check before varnish
Pro Tip: Set a 15-minute timer for the block-in phase. When it goes off, step back and do a squint check before continuing. The timer prevents the tunnel-vision drift that causes proportion errors in longer sessions. For a beginner-friendly overview of the full process, the beginner’s guide to painting is a solid companion resource.
Key Takeaways
Accurate paint-by-numbers work comes from pairing value checks, proportional measurement, and matched brush size before adding any detail.
| Point | Details |
|---|---|
| Value before color | Run the squint test and grayscale check first; correct light/dark structure before adjusting any hue. |
| Neutral gray mixing | Test every mixed swatch on a gray surface to avoid optical contrast illusions that distort color judgment. |
| Grid for proportions | Use a simple grid or reference points for complex areas; label squares and verify intersections early to prevent compounding errors. |
| Brush-to-area match | Switch to a precision detail brush for any numbered zone smaller than your thumbnail; paint consistency should be creamy, not watery. |
| Craftybynumbers kits | Craftybynumbers kits include pre-printed canvases, acrylic paints, and detail brushes, giving hobbyists the right tools for each accuracy method above. |
Why these methods work for relaxed hobby painters
The accuracy techniques in this article were chosen specifically because they fit into a calm, enjoyable session without turning painting into a technical exercise. The squint test takes ten seconds. A neutral gray mixing spot costs nothing. Swapping brushes for a small numbered area is a three-second habit. None of these interrupt the meditative quality that makes paint-by-numbers worth doing in the first place.
Craftybynumbers has built its kits around exactly this balance: over 120,000 satisfied customers have used pre-printed canvases, quality acrylics, and included detail brushes to get a polished result without needing formal training. The methods here work with those tools, not around them. Keep the session checklist from the workflow section beside your easel, reach for the right brush when a small area demands it, and the accuracy improvements will show up without any extra stress.
The right brushes make every accuracy method easier
The techniques above only reach their potential when your brushes match the task. Craftybynumbers offers three brush options built for exactly this kind of precision work.
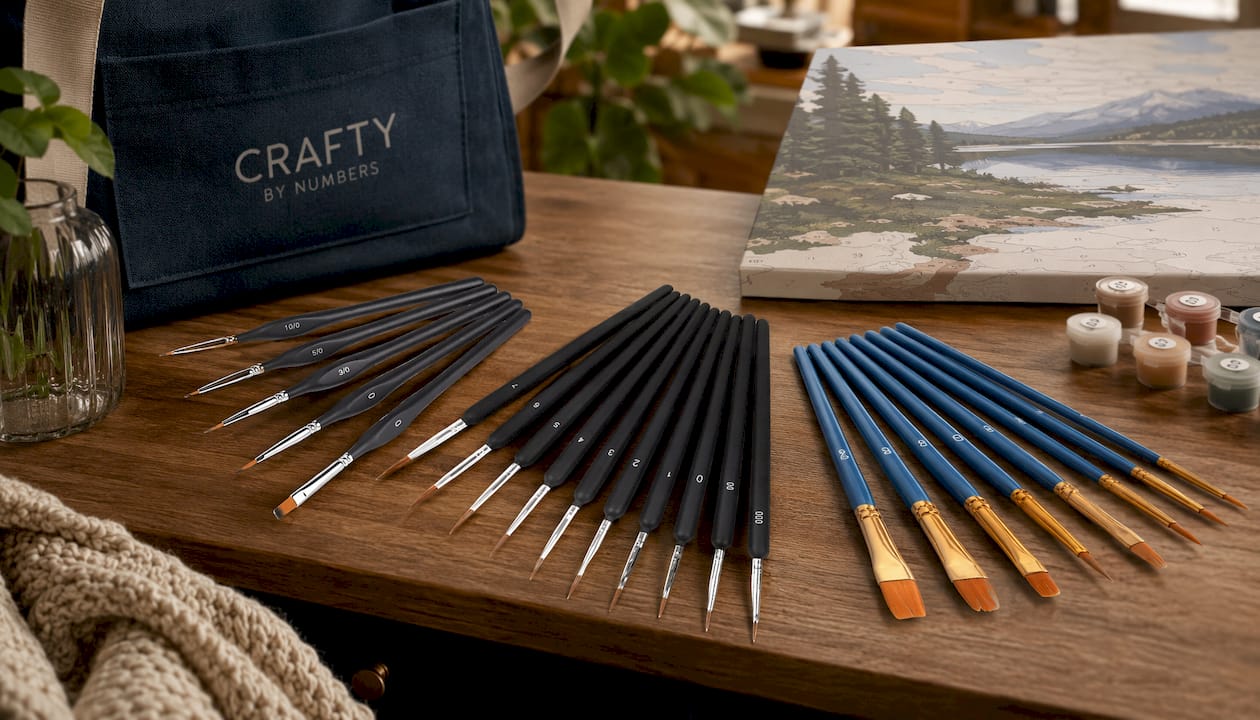
The Precision Detail Brushes (Set of 10) are the go-to for tiny numbered zones, clean edge work, and dot-and-line drills. The Premium Paint Brushes (Set of 10) handle mid-size fills and the kind of controlled strokes that keep transitions smooth. For larger block-ins where you want even coverage fast, the Professional Brushes deliver steady, consistent results across bigger sections.
Choosing the right brush for each phase of the session is one of the fastest ways to reduce mistakes and keep paint consistency where it needs to be. Browse the full brush range at Craftybynumbers and pick the set that fits how you paint.
FAQ
What is the fastest way to check painting accuracy mid-session?
The squint test is the quickest check: squint at both your reference and canvas until details blur, then compare the major light and dark masses. A grayscale photo of your canvas adds a second layer of confirmation in under a minute.
Does the grid method work for paint-by-numbers kits?
Yes, especially for complex areas like portraits or large canvases. As Tim Gagnon notes, the grid method is a legitimate measurement tool that frees mental effort for color mixing and brushwork rather than replacing skill.
Why does my paint bleed under the printed lines?
Paint that’s too thin is the most common cause. Keep acrylic paint at a creamy consistency, load less paint on the brush near boundary lines, and wipe excess on a paper towel before each stroke close to an edge.
How long should a typical paint-by-numbers session take?
A focused session following the block-in, refine, and detail workflow typically runs about an hour. Acrylic layers dry to the touch in 20–30 minutes, so you can layer colors within a single session without long waits.
Which Craftybynumbers brush is best for small numbered areas?
The Precision Detail Brushes (Set of 10) are designed for exactly that task. Their small-diameter tips stay inside tight numbered zones and give you the control needed for dot work, edge tracing, and fine line fills.
0 comentarios