

The fastest reliable way to blend acrylics paint by numbers is wet-on-wet, using a soft flat or filbert brush to feather two colors together before they dry. Keep a glazing medium nearby for a slower, more controlled option once you’re ready for detail work. Grab a brush, two adjacent paint colors, and a little water or glazing medium, then practice on a scrap gradient strip before touching your canvas.
TL;DR:
- Mismatched or unaligned paint palettes can lead to muddy blends, so using matched colors designed for blending improves clarity and vibrancy.
- Wet-on-wet blending is fastest but demands quick work, while wet-on-dry glazing offers more control but takes longer with multiple thin layers.
- Premixing a bridge tone between colors enhances smoothness by preventing harsh seams, especially when working with contrasting value ranges.
- Correcting blending mistakes involves letting paint dry fully before applying a glaze or repainting over the error; never scrape wet paint aggressively.
- Proper surface preparation, including flattening and cleaning the canvas beforehand, greatly reduces texture issues that hinder smooth blending.
Table of Contents
- What Supplies Do You Need to Blend Acrylics on a Paint-by-Numbers Kit?
- How Do You Blend Acrylics Wet-on-Wet Step by Step?
- How Do You Use the Wet-on-Dry Glazing Method for More Control?
- How Do You Premix a Bridge Tone to Avoid Muddy Blends?
- What Are the Most Common Blending Mistakes and How Do You Fix Them?
- How Long Should Painted Areas Dry Before Varnishing?
- How Do You Clean and Maintain Brushes While You’re Blending?
- How Do You Fix a Blending Mistake Without Ruining the Paint Underneath?
- How Do You Prepare a Paint-by-Numbers Canvas Before Blending?
- How Do You Layer Colors to Build a Smooth Gradient?
- A Beginner’s Honest Take on Learning to Blend
- Which Craftybynumbers Kits Are Best for Practicing Blends?
- Sources
- FAQ
What Supplies Do You Need to Blend Acrylics on a Paint-by-Numbers Kit?
A Craftybynumbers kit already gives you most of what blending requires: a pre-printed canvas, matched acrylic paints, and detail brushes sized for small numbered shapes. That matched palette matters more than it seems. Colors mixed and packaged to work together blend cleaner than paints you’ve grabbed from mismatched tubes, because their pigment strength and undertones are already compatible.
Brush choice changes your results just as much as paint choice. A flat brush covers broad areas and handles long gradients, a filbert brush has a rounded tip that softens edges and curves, and a soft synthetic brush lays down smoother strokes with less visible texture than stiffer bristles, according to the Russell Collection’s guide to acrylic blending.
Beyond the brush, a few extras make blending far less frustrating:
- A glazing medium or retarder to slow drying time, since these mediums extend how long paint stays workable without breaking down the paint’s binder
- A stay-wet palette if you have one; plain water thins paint but weakens its coverage when overused
- A small mixing tray for premixing transition tones
- A jar of water and paper towels within arm’s reach for quick brush cleanups
How Do You Blend Acrylics Wet-on-Wet Step by Step?
Wet-on-wet is the technique most paint-by-numbers instructions default to, and for good reason: it’s fast, forgiving on small shapes, and doesn’t require waiting around. The tradeoff is speed. Acrylics dry quickly, so wet-on-wet blending demands you work before the paint sets.
- Premix a small transition swatch. On your tray, blend a touch of both colors together to preview the midpoint tone you’re aiming for.
- Apply the first color in short, even strokes across roughly two thirds of the numbered shape.
- Load the second color onto a clean or barely damp brush and apply it into the remaining space, slightly overlapping the first color’s edge.
- Feather the junction with light up and down strokes, working the brush back and forth exactly where the two colors meet.
- Rinse the brush before switching to a third color or a very different tone, so you don’t drag muddy pigment into a clean area.
- Work top to bottom. Gravity and habit both favor this order, and it keeps drips from crossing into sections you’ve already finished.
If the paint starts tacking up before you’ve finished feathering, that’s your cue to add a drop of retarder to your paint or mist your palette lightly. Slow-drying mediums buy you real time on warm days or in dry rooms, which is exactly when acrylics set fastest.
Pro Tip: Do a test gradient on a scrap piece of card first. Two minutes of practice tells you how your specific paints behave before you commit to the numbered canvas.
How Do You Use the Wet-on-Dry Glazing Method for More Control?
Glazing solves the one problem wet-on-wet can’t: time pressure. Instead of merging two wet colors on the canvas, you build the illusion of a blend through thin, transparent layers applied over a dried base coat. Wet-on-dry glazing trades speed for control, which makes it the better choice for tight, detailed shapes where a rushed wet-on-wet pass tends to smear past the lines.
Start with your darker base color and let it dry, either partially or fully, depending on how soft you want the eventual transition to look. Mix your next color with a glazing medium at roughly a one-to-one ratio, thinning it into a see-through wash rather than a solid coat. Glazing mediums come in gloss, semi-gloss, and matte finishes, so pick the one that matches how shiny or flat you want the final piece.
Apply the glaze in thin passes, letting each one dry before adding the next. Building three or four thin layers almost always looks smoother than one thick one.
- Thin layers dry faster and stay more transparent than thick ones
- Wait a reasonable short time between glazes on small paint-by-numbers areas.
- Test your glaze ratio on scrap card before applying it to the canvas
- Use this method for fine details, faces, or small gradient shapes where wet-on-wet feels too rushed
Pro Tip: Keep your glazes thin enough to see the layer underneath. If you can’t see any of the base color through the glaze, you’ve mixed it too thick.
How Do You Premix a Bridge Tone to Avoid Muddy Blends?
Muddy blends almost always trace back to one missing step: a bridge tone. Premixing a mid-tone that sits between your two main colors and placing it right at the junction before you start feathering gives you a smoother transition with far less brushwork. Instead of asking two colors to figure out their relationship on the canvas, you’ve already solved it on the palette.
Value, meaning how light or dark a color is, matters more than hue when you’re troubleshooting a rough blend. Two colors with wildly different values will always look choppy at their seam, no matter how carefully you feather them, because your eye reads the lightness jump before it reads the color itself. Matching value first keeps blends bright instead of gray.
A few habits keep this process clean:
- Rinse your brush between major tone changes, not just at the end of a session
- Limit the number of feathering passes; excessive brushing starts lifting paint instead of blending it.
- Warm up with a simple black-to-white gradient strip before starting on the canvas
- Try a two-color test strip using your actual kit colors to preview how they’ll behave together
What Are the Most Common Blending Mistakes and How Do You Fix Them?
Nearly every beginner blending mistake falls into one of four categories, and each one has a fast fix.
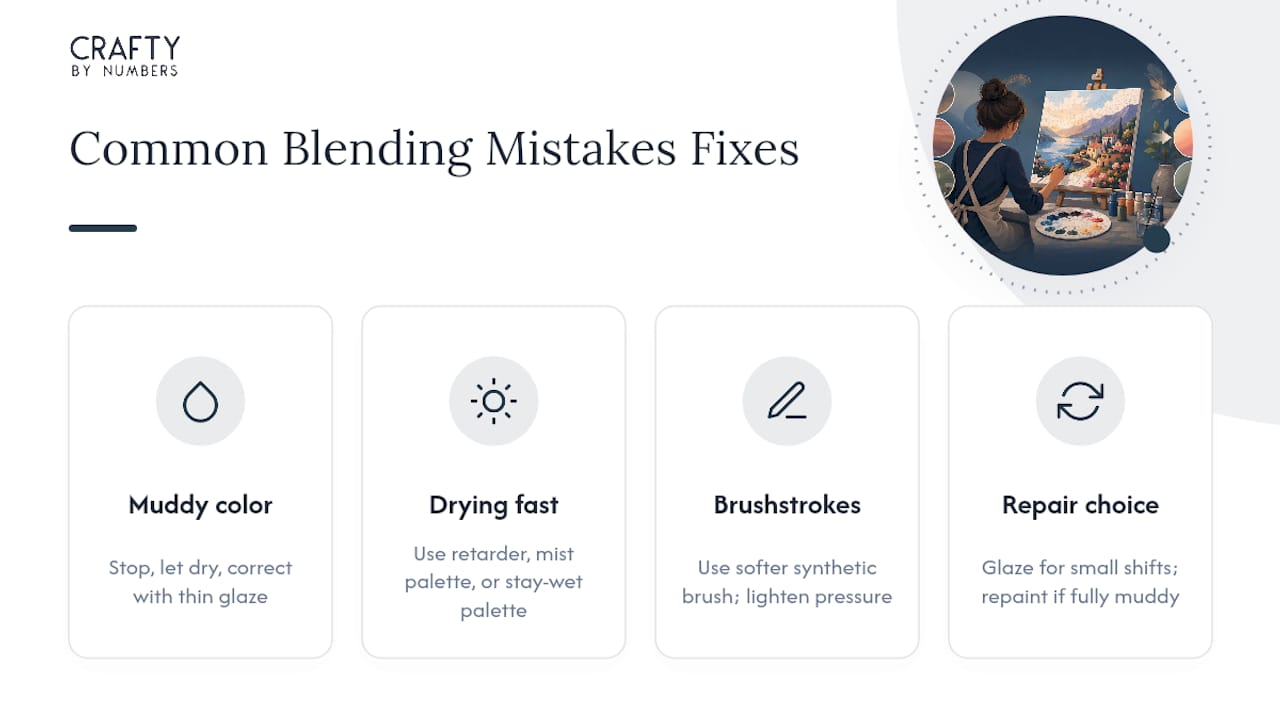
Muddy color. This is the single most common issue, and it usually comes from over-blending. Working paint past the point where it turns tacky destroys its vibrancy rather than smoothing it out. The fix: stop immediately, let the area dry completely, then correct it with a thin glaze rather than reworking wet paint. Avoid mixing direct complementary colors (red and green, orange and blue) straight on the canvas. That combination turns gray fast.
Paint drying too quickly. Add a retarder, lightly mist your palette, or switch to a stay-wet palette if you’re painting in a warm room.
Visible brushstrokes. Switch to a softer synthetic brush, lighten your hand pressure, or apply one thin glaze over the area to soften the texture.
Deciding whether to repaint or layer a fix. Small color shifts usually respond well to a glaze layer. If an area has genuinely gone muddy or gray beyond saving, let it dry and repaint that section from scratch rather than fighting it further.
How Long Should Painted Areas Dry Before Varnishing?
Full cure times vary by paint brand, so check your kit’s paint labels. As a general rule, thin acrylic layers need at least 24 to 72 hours before varnishing, though full chemical curing can take longer.
Choosing between gloss and matte varnish comes down to how you want your finished piece to read on the wall. Gloss deepens color saturation and adds shine, which suits vivid, high-contrast pieces. Satin or matte varnish cuts glare and gives a softer, more subdued finish, better for pieces you’ll hang somewhere with a lot of natural light.
- Apply varnish in thin, even coats rather than one thick layer
- Let each coat dry fully before adding another
- Mount pre-printed canvases on a simple frame or canvas stretcher to keep them flat
- Keep finished pieces out of direct sunlight to slow fading, and dust gently with a dry cloth
How Do You Clean and Maintain Brushes While You’re Blending?
Brush care during a blending session matters just as much as brush choice. Acrylic paint that dries in the bristles is essentially permanent, and a stiff, crusted brush will never feather a gradient smoothly again.
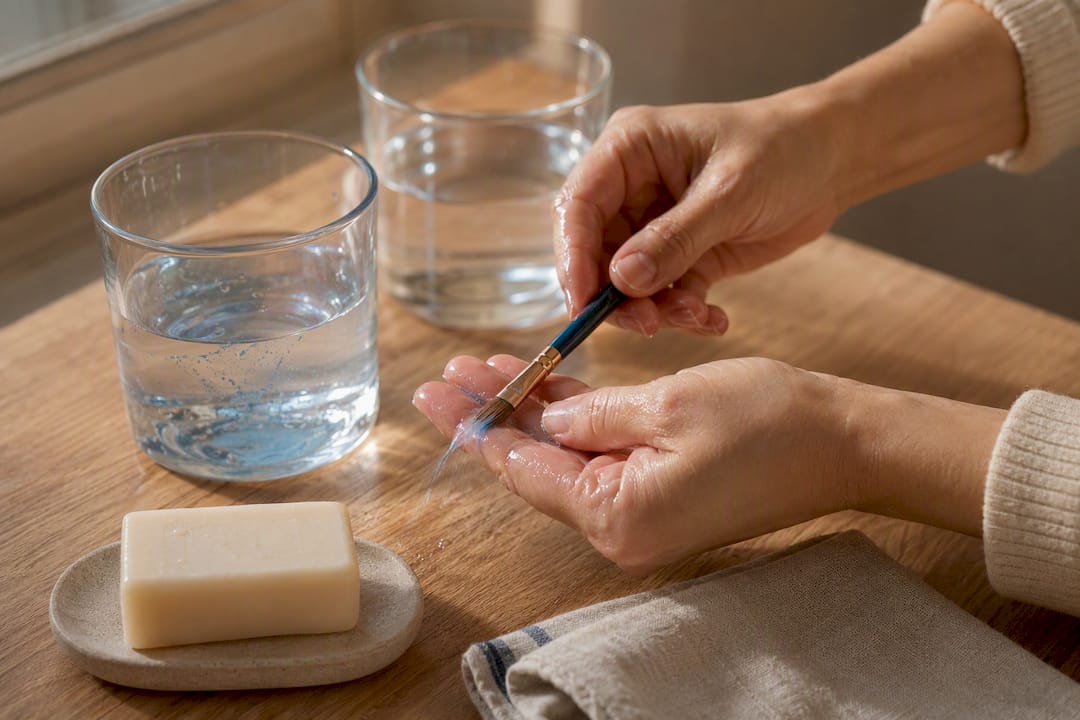
Rinse your brush in clean water every time you switch colors, especially between a dark tone and a light one. A quick swirl isn’t always enough. Press the bristles gently against the side of your water jar or a paper towel to work pigment out of the base of the brush, not just the tip, since that’s where paint builds up fastest and dries hardest.
Keep two water containers going if you can: one for a first rough rinse, one for a final clean rinse. This stops you from reintroducing a faint tint of your last color into a brush you thought was clean, which is a sneaky way muddy blends happen even when you thought you rinsed properly.
Reshape bristles between colors by gently pulling them back into a point or flat edge with your fingers while they’re still damp. A splayed or bent brush tip drags unevenly and creates the choppy strokes that ruin an otherwise good blend.
Never let a brush sit loaded with paint, even for a few minutes. Acrylic starts skinning over fast, and once it hardens near the ferrule, that brush’s soft blending performance is gone for good. At the end of a session, wash brushes with a mild soap, reshape them, and let them dry flat rather than standing bristle side down in a jar.
How Do You Fix a Blending Mistake Without Ruining the Paint Underneath?
Mistakes happen mid-blend more often than beginners expect, and the fix depends on how wet the area still is.
If the paint is still wet and just looks a little off, a soft, dry brush can sometimes lift excess color before it sets. Drag it lightly across the surface without pressing down, which pulls up a thin layer of the wet paint without disturbing what’s underneath.
If the area has already gone tacky, stop touching it immediately. Continuing to brush over tacky paint is what turns a minor issue into a genuinely muddy mess. Let it dry completely instead, even if that means pausing your session for an hour.
Once dry, correct the mistake with a thin glaze rather than scraping or repainting from zero. A light wash of your intended color, mixed with glazing medium, sits on top of the dried error and gently shifts the tone without disturbing the paint layer underneath. This is the same principle behind the wet-on-dry method itself: transparency corrects color without demanding you remove anything first.
For larger errors, like an entire shape gone wrong, let the area cure fully, then apply your correct base color as a fresh, slightly thicker coat directly over it. Dried acrylic provides a stable surface for repainting, so you’re not fighting wet paint underneath while you fix the visible layer.
How Do You Prepare a Paint-by-Numbers Canvas Before Blending?
Surface prep gets skipped constantly, and it’s one of the easiest ways to guarantee smoother blending later. A pre-printed canvas that’s slightly warped, dusty, or unevenly primed will cause paint to drag or pool unevenly right when you’re trying to feather two colors together.
Unroll or unfold your canvas well before you plan to paint, ideally the night before, and let it lie flat under a light weight (a few heavy books work fine) to relax any creases. Wrinkled canvas creates uneven surface texture, and that texture shows up as streaky, inconsistent blends no matter how good your technique is.
Wipe the surface gently with a dry cloth to remove dust before you start. A dusty canvas grabs paint unevenly, especially in a thin wet-on-wet layer where texture differences are exaggerated.
Work in a well-lit space where you can actually see subtle value differences between your paint colors. Blending under dim light is one of the most overlooked reasons colors that looked fine while painting turn out mismatched once the piece is finished and viewed in daylight.
Finally, keep your canvas flat and stable while you paint rather than propped at a steep angle. Wet paint runs downhill, and a tilted surface turns careful feathering into accidental drips before you’ve even finished the stroke.
How Do You Layer Colors to Build a Smooth Gradient?
Gradients that look professionally smooth are almost always built in layers rather than achieved in one pass. Start with your base tone across the full shape, then introduce your second color gradually from one end, building density with each additional layer rather than trying to nail the transition immediately.
Apply thin layers and let each dry slightly before adding the next, especially when working the glazing method. This gives you the freedom to adjust the transition point if it’s landing in the wrong spot, since a single heavy layer commits you to whatever placement you started with.
Working top to bottom helps keep your workflow consistent and reduces the chance of drips crossing into finished sections, particularly on vertical gradients like skies or fabric folds. Larger background areas respond well to a broad flat brush and a light hand, while small detail zones benefit from switching to a smaller filbert for tighter control near the edges.
A quick warm-up strip, a simple black-to-white value scale or a two-color gradient using your kit’s actual paints, calibrates your brush pressure and timing before you touch the real canvas. It takes two minutes and saves you from learning your paint’s drying speed the hard way, mid-project.
A Beginner’s Honest Take on Learning to Blend
Blending is one of the few painting skills that rewards patience over talent. Most people assume it takes a steady hand and years of practice, but a five-minute test strip and a willingness to stop before paint goes tacky will get a beginner further than pure natural skill ever will.
Craftybynumbers kits make this easier because the palette is already matched and the brushes are sized for the job, and with over 120,000 kits sold, that’s not a small sample size. Short, low-pressure sessions turn blending into something closer to a calming ritual than a technical hurdle.
— Paula S.
Which Craftybynumbers Kits Are Best for Practicing Blends?
Some kits are simply built better for practicing blends than others, and picking one with a rich, graduated palette makes those first attempts far less frustrating. Blue Bloom gives you a richly layered color range that rewards careful wet-on-wet feathering across its floral gradients. Crimson Cloak leans into strong tonal contrast, which makes it a genuinely good pick if you want to practice matching value before hue, exactly the discipline that keeps blends from turning muddy. Sunset Bliss works through warm, graded tones that forgive small mismatches, making it a comfortable starting point for glazing practice.
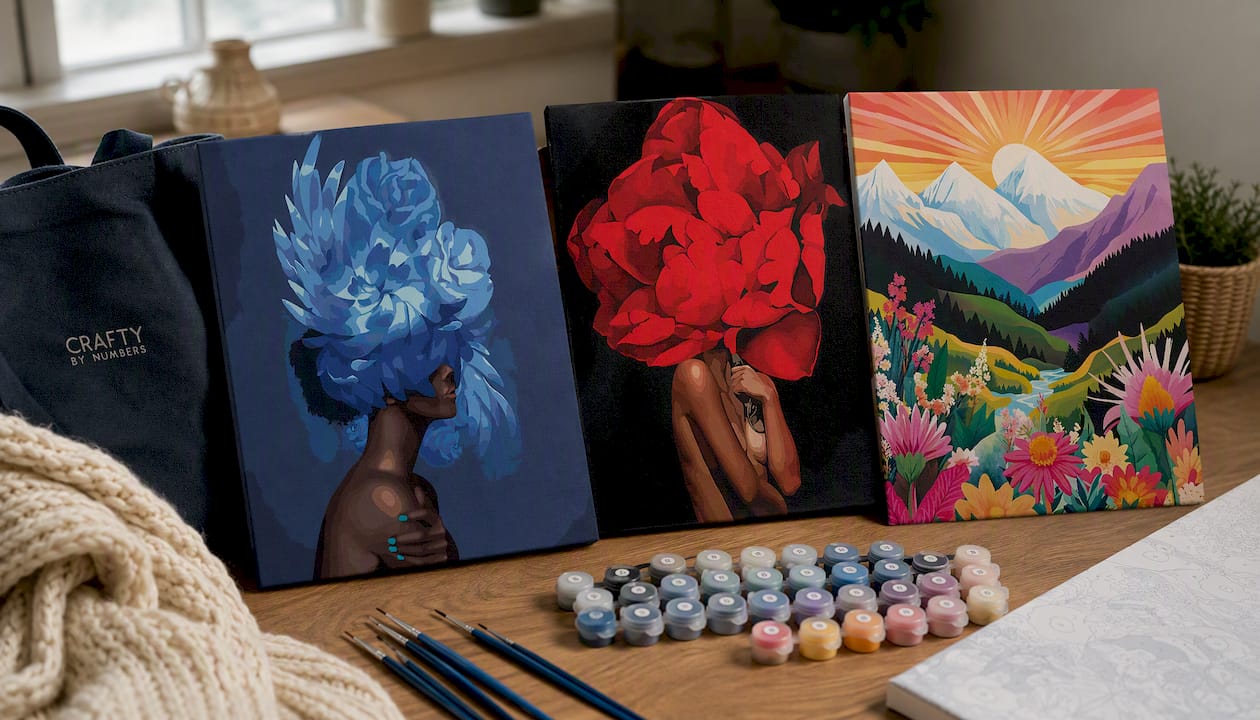
Kits typically ship with a pre-printed canvas, matched acrylic paints, and detail brushes, providing the basic supplies needed for blending techniques like those covered above. Personalized options are also available if you’d rather practice blending on a custom photo kit instead of a themed design. Browse the full kit collection and pick a palette that matches the technique you want to practice first.
Sources
For more depth on specific methods mentioned above, these guides go further:
- What is Blending in Acrylic Painting? How to Master It
- How to Blend Acrylic Paint: 3 Mixing & Glazing Methods
- How To Blend Acrylic Paint | Jerry’s Artarama
- 11 Techniques To Blend Acrylic Paint Smoothly | Acrylic Painting School
FAQ
What Is the Easiest Way to Blend Acrylics on a Paint-by-Numbers Kit?
Wet-on-wet blending with a soft flat or filbert brush is the fastest starting method, since you apply two colors while both are still wet and feather them together at the seam.
Why Do My Blended Colors Look Muddy?
Muddy blends almost always come from over-blending past the point where paint turns tacky, or from mixing complementary colors like red and green directly on the canvas.
Can I Use Water Instead of a Glazing Medium to Blend Acrylics?
Water thins paint temporarily, but overusing it weakens coverage and adhesion; a glazing medium or retarder extends working time without breaking down the paint.
How Long Should I Wait Before Varnishing a Blended Piece?
Wait a day or more for thin acrylic layers to dry before varnishing, though you should always check the specific paint manufacturer’s guidance for full cure time.
Which Craftybynumbers Kits Work Best for Practicing Blending?
Blue Bloom, Crimson Cloak, and Sunset Bliss all include detailed, graduated palettes and matched brushes that make wet-on-wet and glazing practice noticeably easier for beginners.
0 Kommentare