


Canvas painting for kids is defined as a structured creative activity where children apply paint to a stretched canvas surface to build fine motor skills, self-expression, and confidence. When you introduce children to canvas painting, you give them a medium that feels more permanent and exciting than paper. The result is a finished piece worth hanging on the wall. Research confirms that process-focused art benefits sensory and developmental growth far more than chasing a perfect image. With the right supplies, a clear setup, and a focus on exploration over perfection, any parent or caregiver can make this a rewarding weekly habit.
What supplies do you need to start canvas painting for kids?
The right materials make the difference between a fun session and a frustrating one. You do not need to spend much. Basic canvases cost as little as $1 each, and bundled kits with paints and brushes typically run $20–$25. That low entry cost means you can experiment without pressure.
Educators recommend using non-toxic, child-grade paints and limiting colors to 2–3 at a time to avoid muddy results, especially for children under 5. Acrylic paints labeled “non-toxic” and “washable” are the safest choice. They dry quickly, which keeps sessions moving and reduces the chance of smearing.
Here is what every starter kit should include:
- Canvas panels or stretched canvases (6x8 inch or 8x10 inch work well for small hands)
- Flat and round brushes in at least two sizes, one wide for backgrounds and one fine for details
- Non-toxic acrylic or tempera paints in a limited palette of 3–5 colors
- A plastic palette or paper plate for mixing
- A water cup and paper towels for rinsing between colors
- A plastic tablecloth or drop cloth to protect surfaces
Pre-printed canvas kits are worth considering for first sessions. Affordable pre-printed kits with included paints and brushes promote confidence and produce display-worthy art, with options designed for children aged 3 and up. Pre-printed designs remove the intimidation of a blank surface. That single change dramatically improves how quickly children engage.
| Canvas type | Best for | Pros | Cons |
|---|---|---|---|
| Stretched canvas | Ages 5 and up | Durable, display-ready | Pricier, heavier |
| Canvas panel (board) | Ages 3 and up | Affordable, easy to handle | Less texture, not framed |
| Pre-printed canvas | All ages | Guided design, no setup | Limited creative freedom |
| Canvas paper pad | Practice sessions | Cheap, low-stakes | Not display-ready |
Pro Tip: Buy canvas panels in bulk packs rather than individual stretched canvases. You get more practice surfaces for the same budget, and children feel free to experiment without worrying about “wasting” a canvas.
How do you set up and run a children’s painting session?
Setup determines whether a session feels calm or chaotic. A clear, repeatable routine removes friction and lets children focus on painting rather than logistics. Structured painting sessions lasting about 20–30 minutes maintain the attention of younger children effectively. Plan to stop before they get tired, not after.
Follow these steps for a smooth session:
- Cover the workspace. Lay a plastic tablecloth flat on the table before anything else. This single step cuts cleanup time in half.
- Set out supplies in advance. Place the canvas, palette, brushes, water cup, and paper towels before calling children over. Waiting while you organize loses their attention fast.
- Introduce the canvas. Show children the surface and explain that paint sticks differently to canvas than to paper. Let them touch it first.
- Choose a starting point. Use a bold-outline template or tape-resist design to give children a clear visual framework. This removes “blank canvas syndrome” and gets paint on the surface within the first minute.
- Demonstrate one technique. Show how to load a brush, wipe off excess paint, and apply it in one direction. Keep the demo under two minutes.
- Step back and let them paint. Resist the urge to correct or guide every stroke. Your job at this stage is to refill water cups and offer encouragement.
- Signal the end clearly. Give a five-minute warning before stopping. Children handle transitions better with notice.
- Clean up together. Rinse brushes in water, wipe the palette, and let the canvas dry flat. Making cleanup part of the routine teaches responsibility alongside creativity.
Pro Tip: Run painting sessions in the morning when children are freshest. Afternoon sessions after school or activities often lead to shorter attention spans and more frustration.
A family painting night is another format worth trying. When adults paint alongside children, the activity feels collaborative rather than instructional. Children relax and take more creative risks when they see adults making “mistakes” too.
Which painting techniques work best for children on canvas?
Simple techniques produce the most confidence. The goal is not realism. The goal is a child who wants to pick up a brush again next week. Experts confirm that the primary aim of early painting is exploration and confidence-building, not technical skill.
These techniques are reliable, age-appropriate, and genuinely fun:
- Flat color filling. Children paint inside bold outlines using a single color per section. This builds brush control and patience without requiring any mixing skill.
- Color blending. Place two colors side by side while wet and use a dry brush to blend the edge. Children love watching colors merge. Start with blue and yellow to make green, which feels like a science experiment.
- Textured brushstrokes. Load a stiff brush with thick paint and dab or drag it across the canvas. The result looks intentional and interesting, even for very young painters.
- Finger painting on canvas. Canvas texture makes finger painting feel different from paper. The slight resistance creates natural patterns that look striking when dry.
- Tape-resist art. Press painter’s tape onto the canvas in a geometric pattern, paint over it, then peel the tape when dry. Canvas texture means tape edges appear softer than on paper, so set that expectation with children beforehand. The reveal moment when tape comes off is genuinely exciting for kids.
- STEAM-inspired themes. Linking painting to science or nature boosts engagement and perceived meaning. Paint a night sky and discuss planets. Paint leaves collected from the backyard. The art becomes a record of something real.
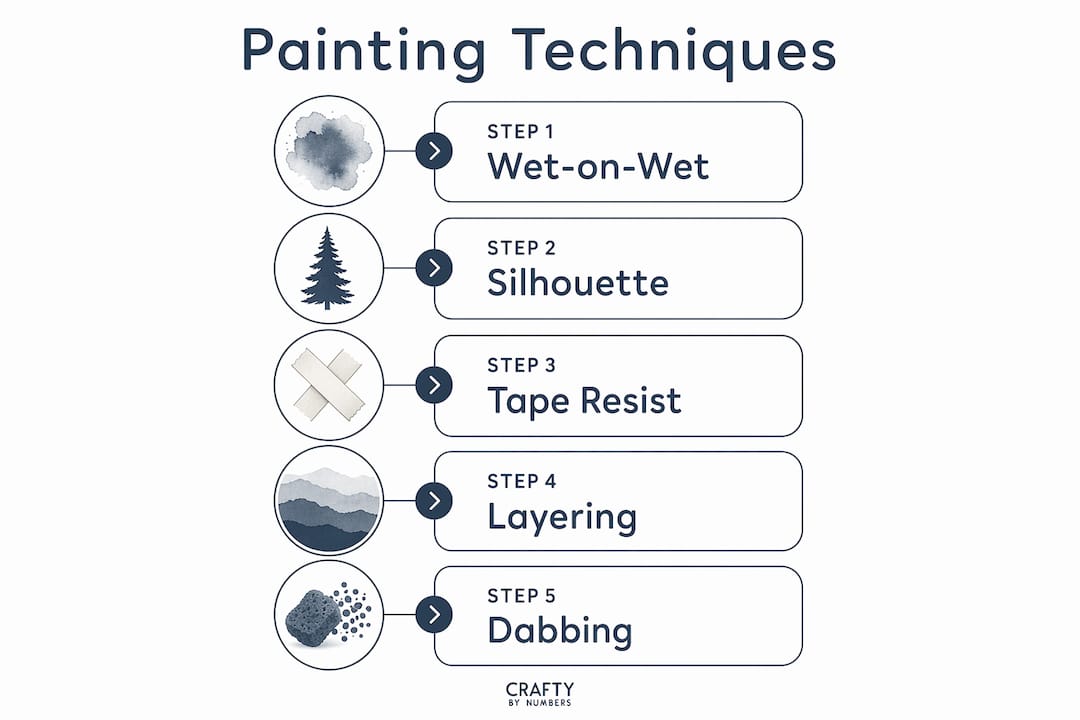
For a broader look at beginner-friendly painting styles, simple approaches like wet-on-wet backgrounds and silhouette painting translate well to canvas for children of all ages.
How do you support creativity while handling common challenges?
The most common mistake parents make is focusing on the finished product. Treating canvas painting as playful exploration rather than a performance leads to more positive, sustained creativity for both children and caregivers. When a child says “I ruined it,” redirect attention to what they like about the painting, not what went wrong.
Color muddiness is the most frequent technical problem. It happens when children mix too many colors on the palette or rinse brushes incompletely. Limiting the palette to 2–3 colors per session solves this almost entirely. Teach children to wipe their brush on a paper towel before switching colors, not just dip it in water.
| Common challenge | Why it happens | Solution |
|---|---|---|
| Muddy colors | Too many colors mixed together | Limit palette to 2–3 colors per session |
| Blank canvas paralysis | No starting point or structure | Use a pre-printed canvas or bold outline template |
| Short attention span | Session too long or too complex | Keep sessions to 20–30 minutes with a clear endpoint |
| Over-perfectionism | Focus on the product, not the process | Praise specific choices (“I love that blue”) not the whole painting |
| Paint bleeding under tape | Tape not pressed firmly enough | Press tape edges down firmly before painting |
Displaying finished canvases matters more than most parents realize. When a child sees their work on a wall, they feel their effort was worth something. A simple guide on turning painted canvas into a display can help you present even small canvases in a way that looks intentional and polished.
Pro Tip: Give children two or three color choices rather than the full set. Fewer options reduce decision fatigue and produce cleaner, more satisfying results.
Key Takeaways
The most effective way to introduce children to canvas painting is to prioritize process over product, limit colors, use structured starting points, and keep sessions short and consistent.
| Point | Details |
|---|---|
| Start with the right supplies | Use non-toxic acrylic paints, canvas panels, and two brush sizes to keep setup simple. |
| Limit colors per session | Offer 2–3 colors at a time to prevent muddy results and reduce decision fatigue. |
| Use structured starting points | Pre-printed canvases or bold-outline templates remove blank canvas paralysis immediately. |
| Keep sessions to 20–30 minutes | Shorter sessions match children’s attention spans and end on a positive note. |
| Focus on process, not product | Praising effort and exploration builds confidence and keeps children coming back. |
Why I stopped worrying about the finished painting
I used to set up painting sessions with a clear picture in my head of what the canvas should look like at the end. That expectation ruined more sessions than any spilled paint ever did. The moment I let go of the outcome and watched what children actually did with a brush and a blank surface, everything changed.
Children do not paint to produce art. They paint to feel something. The drag of a loaded brush, the surprise of two colors meeting, the satisfying peel of tape off canvas. Those are the moments that matter. The finished canvas is just evidence that those moments happened.
One thing I have learned from running sessions with kids of different ages: the children who struggle most are usually the ones who have been told their drawing “looks wrong” before. Canvas painting is a chance to reset that. A canvas does not look wrong. It looks like the person who painted it, and that is always worth displaying.
My honest recommendation is to skip the elaborate project planning for the first three sessions. Put out three colors, a canvas panel, and two brushes. See what happens. You will learn more about what your child needs from watching that first free session than from any structured lesson plan.
— Paula S.
Ready to paint? Craftybynumbers kits make it easy
Craftybynumbers designs canvas painting kits that take the guesswork out of getting started. Each kit arrives with a pre-printed canvas, high-quality acrylic paints, and detail brushes, so you spend less time sourcing supplies and more time painting.

The Ivory Essence kit is a strong first choice for young painters. Its clear design sections and vibrant color palette make it approachable for beginners while producing a finished canvas worth displaying. Craftybynumbers has served over 120,000 customers, and the kits are built to make the first session feel like a success. For a full breakdown of what a quality kit includes, the complete art kit guide covers every supply category in detail.
FAQ
What age can children start canvas painting?
Children as young as 3 can paint on canvas using pre-printed kits and washable tempera paints. Stretched canvases and acrylic paints work better for children aged 5 and up.
How do I prevent colors from getting muddy?
Limit the palette to 2–3 colors per session and teach children to wipe brushes on a paper towel before switching colors. Rinsing alone does not remove enough pigment to prevent mixing.
How long should a children’s painting session last?
Sessions of 20–30 minutes work best for children under 8. Ending while children are still engaged leaves them wanting to paint again rather than feeling drained.
Do I need special paint for canvas?
Non-toxic acrylic or washable tempera paints work well on canvas for children. Avoid oil paints, which require solvents for cleanup and are not safe for young children.
What is tape-resist art on canvas?
Tape-resist art involves pressing painter’s tape onto a canvas in a pattern, painting over it, and peeling the tape when dry to reveal clean lines. Canvas texture creates softer edges than paper, so the effect looks slightly blended rather than sharp.
0 commentaire