

Twelve projects will get you through the next school break without a single “I’m bored” meltdown: paint-by-numbers ornaments (ages 6+, 45 to 90 minutes, kids love watching a picture appear), salt-dough ornaments (5+, 60 minutes plus overnight drying), paper-plate puppets suitable for children aged three and above, taking about twenty minutes, sidewalk chalk murals suitable for children of all ages, taking around half an hour to an hour, nature rubbings suitable for children aged four and above, taking about fifteen minutes, collage bookmarks (5+, 20 minutes), tin-foil prints suitable for children aged three and older, lasting about fifteen minutes, cupcake-case flowers for children aged three and older, taking about twenty minutes, wind mobiles suitable for children aged six and above, approximately forty minutes in duration, marbled shaving-cream paper (5+, 30 minutes), water-activated pencil drawings appropriate for children aged four and above, about twenty minutes long, and paper-straw Christmas trees (5+, 30 minutes).
If you only have ten minutes to decide right now, grab a paint-by-numbers kit. It needs zero setup beyond opening the box, and the numbered canvas does the planning for you.
Key Takeaways
The fastest route to a stress-free school holiday is picking one age-matched, low-prep project with a clear finish, rather than a long list of ambitious ones.
| Point | Details |
|---|---|
| Start with the quick pick | Paint-by-numbers kits need no setup planning and work for the busiest holiday mornings. |
| Match projects to weather | Outdoor ideas like chalk murals and nature rubbings adapt to sun, wind, or rain with small swaps. |
| Use recycled materials first | Cereal boxes, toilet rolls, and bottle caps cut costs and build design-thinking skills. |
| Scale by age, not by project | Adjust step count and supervision level rather than inventing a new activity for each child. |
| Finish and display matters most | A completed, displayed project like a Ho Ho Holiday Magic ornament kit builds more confidence than an ambitious unfinished one. |
Table of Contents
- Fun Art Projects for School Holidays: Indoor, Outdoor, and Seasonal Picks
- What Supplies Do You Actually Need?
- How Do You Adapt One Project for Every Age?
- How to Make Family Ornaments in One Afternoon
- Why Simple Holiday Crafts Actually Matter for Kids
- Quick Safety and Setup Checklist
- An Editor’s Take on Holiday Art Projects
- Try the Ho Ho Holiday Magic Ornament Kit This Break
- Sources
- FAQ
Fun Art Projects for School Holidays: Indoor, Outdoor, and Seasonal Picks
Sorting projects by where they happen (and what the sky is doing) saves you from the classic holiday trap: three kids, one rainy Tuesday, and no plan.
Indoor projects for low-mess days
- Paint-by-numbers kits: the canvas and paints are pre-matched, so cleanup is one rinsed brush per color. Younger kids can work on a mini design while older siblings tackle a detailed scene.
- Collage from magazine scraps and cereal boxes: dump a bin of paper scraps and let kids build a scene. Younger kids tear paper by hand; older kids cut precise shapes with scissors.
- Tin-foil prints: press foil over textured objects (leaves, coins, lace) then rub with crayon for a relief effect. Takes fifteen minutes and barely any cleanup.
Outdoor projects that use the weather instead of fighting it
- Sidewalk chalk murals: claim a stretch of driveway and let the whole group work on one giant picture.
- Nature rubbings: tape paper over bark or leaves and rub with the side of a crayon. On overcast days, try cloud-tracing instead, and on still days, texture rubbings work especially well, while rainy afternoons are perfect for water-activated pencils that only reveal color when wet, a trick worth knowing from outdoor art projects that adapt to any weather.
- Wind mobiles from paper plates and string: hang a few in a tree and watch them spin. Great for a breezy afternoon when chalk would just blow away.
Seasonal and holiday projects
- Paper-straw Christmas trees: cut straws into graduating lengths and glue onto card stock. Works for a five-year-old with pre-cut pieces or a ten-year-old measuring their own.
- Salt-dough or painted ornaments: a multi-day project that spans mixing, drying, and painting, ideal for filling several holiday afternoons rather than one.
- Gingerbread-decor crafts (paper cutouts, not edible builds) avoid the sugar crash and the mess of real icing.
Popular lists of Christmas crafts for kids consistently favor projects like these because they scale up or down with almost no extra planning.
What Supplies Do You Actually Need?
You don’t need a craft closet. A core kit covers most of the projects above:
- Washable acrylic paints in six to eight colors
- A few round and flat brushes in different sizes
- PVA glue, masking tape, and a roll of painter’s tape for masking off shapes
- Construction paper, scissors, and an old shirt or apron per kid
Recycled and low-cost swaps: cereal boxes become collage backing, toilet paper rolls turn into puppet bodies, bottle caps make mosaic tiles, and old newspaper works as a cheap painting surface. Reusing household recyclables cuts costs and teaches kids to match material properties to what they’re trying to build, which is a design skill in its own right. For outdoor work, stick to acrylics rather than watercolors, since acrylics survive a little wind and dry faster if the weather turns.
Set up a small drying rack (a baking tray works fine) and pre-fill mini paint pots the night before so kids can start the second they’re dressed.
Pro Tip: Label each child’s supplies in a shoebox before the holiday starts. It sounds fussy, but it kills the “that’s my brush” arguments before they begin, and a labeled kit makes a project far more likely to actually get finished.
How Do You Adapt One Project for Every Age?
You don’t need a different project for every kid, just a different version of the same one.
- Toddlers (2 to 4): Expect 10 to 15 minutes of focus. Pre-cut shapes, use big brushes, and stay hands-on the whole time. Tin-foil prints and cupcake-case flowers work well here.
- Younger kids (5 to 7): Expect 20 to 30 minutes. Give simple step-by-step prompts and let them handle scissors and glue independently. This is the sweet spot for a small paint-by-numbers canvas, since matching numbers to colors builds sequencing skills.
- Older kids (8 to 11): Expect 40 to 60 minutes and less supervision. Add pattern prompts, mixed media, or a timed challenge to keep it interesting.
- Tweens (12+): Expect 60 to 90 minutes across one or more sittings. Multi-day projects, detailed paint-by-numbers designs, and personalized photo-based kits hold their attention longest.
Drawing and cutting tasks in particular build fine motor control and visual perception that carry over into early reading and math skills, so the “easy” projects for younger kids are doing more work than they look like they are.
How to Make Family Ornaments in One Afternoon
Salt dough is an inexpensive ornament base that can engage children for an extended period with minimal supervision.
You’ll need: flour, salt, water, a rolling pin, cookie cutters, a straw for making a hole, and acrylic paint. If you don’t have oven access, air-dry clay can be used instead.
- Mix flour, salt, and water into a stiff dough.
- Roll to a moderate thickness and cut shapes with cookie cutters.
- Poke a hole near the top with a straw for hanging.
- Let the dough dry thoroughly, either by baking at a low temperature for several hours or air-drying for one to two days.
- Paint once completely dry and hardened.
Troubleshooting: cracks can occur if the dough is too thin or dried too quickly at high temperatures. Smudged paint indicates insufficient drying. Drying can be sped up with a fan but avoid excessive heat that may distort the shapes.
For a shortcut with zero drying time, swap this project for a holiday paint-by-numbers kit instead: same “finished ornament by the end of the afternoon” payoff, none of the 48-hour wait.
Why Simple Holiday Crafts Actually Matter for Kids
A small, unglamorous fact drives most of what works here: children finish more projects, and feel prouder of them, when there’s a labeled kit and a real place to dry and display the result. Structure, not talent, is usually the missing piece.
Occupational therapy research backs this up directly: simple drawing and cutting tasks build visual perception and fine motor control that show up later in reading and math. Paula S., who writes on craft education for Craftybynumbers, points to paint-by-numbers as a particularly forgiving entry point, since the numbered guide removes the blank-page anxiety that stops a lot of kids from starting at all. Craftybynumbers has built over 120,000 customers on that exact idea: a pre-printed canvas, matched paints, and brushes that turn “what do I even paint” into “just follow the numbers.” Their guide on age-appropriate art activities breaks down which kit complexity suits which age.
Pro Tip: If a project usually takes your household three trips to the craft store, a paint-by-numbers kit skips all three. Everything you need arrives matched and ready.

Quick Safety and Setup Checklist
A few minutes of prep prevents most holiday craft disasters:
- Cover the table or floor before anyone touches paint, not after the first drip.
- Keep small parts (beads, sequins) away from kids under three, and let an adult handle any hot glue.
- Use tray-based stations so mess stays contained to one surface, and keep wet wipes within reach.
- If a child loses interest halfway through, pause the project rather than force it. Most holiday crafts survive a 24-hour break just fine.
An Editor’s Take on Holiday Art Projects
Most holiday craft guides oversell the ambition and undersell the setup. You’ll find plenty of lists promising elaborate multi-material builds, and then the actual holiday arrives and nobody has cardboard tubes saved up or three uninterrupted hours. The projects that survive contact with real family life are the ones with almost no lead time: dump a bin of scraps, hand over a set of pre-matched paints, or tape foil over a leaf.
What’s underrated is how much the finishing matters more than the doing. A half-painted canvas shoved in a drawer teaches a kid that art projects don’t get completed. A hung-up chalk mural photo or a displayed ornament teaches the opposite. If you take one thing from this guide, prioritize projects with a built-in end point, something with a clear “done” moment, like a paint-by-numbers canvas that dries flat and hangs on a wall. Ambition is easy to plan. Follow-through is the part parents actually need help with.

Try the Ho Ho Holiday Magic Ornament Kit This Break
Where salt dough asks for two days of drying and a steady hand with paint, this kit skips straight to the fun part. The Ho Ho Holiday Magic – Christmas Ornaments kit comes with pre-printed ornament canvases, matched acrylic paints, and detail brushes, so there’s no dough to mix and no guessing which color goes where.
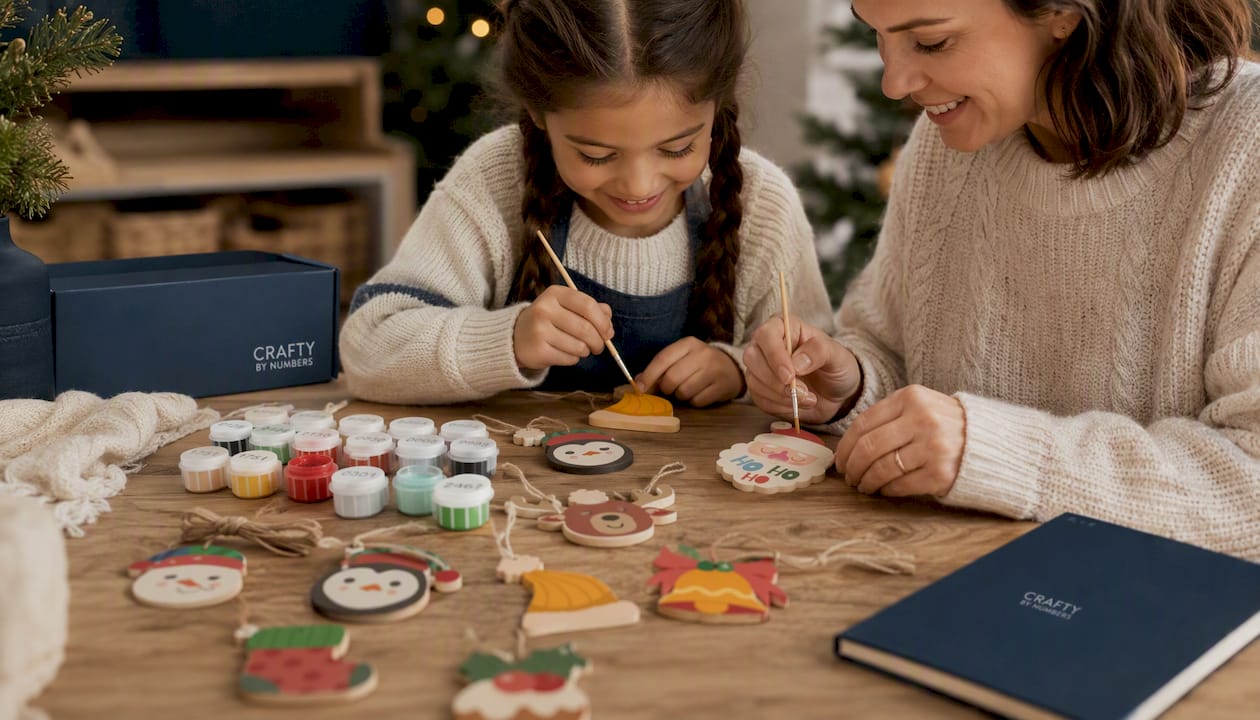
It suits kids around age six and up working alongside an adult, and younger siblings can handle the simpler shapes while older kids take on the more detailed designs. Because Crafty By Numbers builds kits around highly detailed artwork rather than generic outlines, the finished ornaments actually look good hanging on the tree, not just recognizable as “a kid made this.” If your holiday break needs one guaranteed win, order a kit and have it ready before the first free afternoon hits.
Sources
- 5 outside art projects to do in the school holidays — whatever the weather
- Art projects for kids support reading, writing and math skills
- Art ideas for kids to do at home
- Christmas crafts for kids
FAQ
How long should a holiday art project take?
Most projects run 15 to 90 minutes depending on age, though multi-day builds like salt-dough ornaments or detailed paint-by-numbers canvases can stretch across an afternoon or two.
What’s the easiest project for a rainy day?
Water-activated pencils, tin-foil prints, and paint-by-numbers kits all work indoors with minimal mess and no drying wait beyond the paint itself.
How do I keep multiple kids busy with one project?
Pick a shared-surface activity like a sidewalk chalk mural or a large collage, and give each child their own section or supply tray to avoid squabbles.
What age is right for paint-by-numbers kits?
Most kits from Craftybynumbers suit kids around age six and up, with simpler mini designs available for younger children working alongside an adult.
How can I display or preserve finished artwork?
Hang paintings and ornaments where the family sees them daily, photograph collages before they get handled apart, and rotate older pieces into a keepsake folder each season.
Recommended
- Transform Your Room with Birds on Branches Paint By Numbers - Crafty By Numbers - YouTube
- Art Kits for Skill Building: What Parents and Teachers Need to Know – Crafty By Numbers
- Innovative Ideas to Inspire Your Artistry – Crafty By Numbers
- Beginner Art Projects for Adults: Easy Ideas That Work – Crafty By Numbers
0 comments