

An age-appropriate art activity is one that matches a child’s current motor skills, attention span, and developmental stage while keeping materials safe and the experience open enough for genuine exploration. A 4-month-old pressing paint-covered hands onto paper, a 2-year-old smearing finger paint across a tray, and a 5-year-old cutting magazine shapes for a collage are all age-appropriate art activities — each one calibrated to what that child can actually do and benefit from right now. This guide prioritizes process art (the doing, not the finished product) and walks through concrete activities, materials, and adaptations from infancy through early primary.
Table of Contents
- What makes an art activity developmentally appropriate?
- Process art versus product art: which one should you choose?
- Age-by-age guide to art activities
- How to set up an art area that children actually use
- How to scaffold and adapt activities for every child
- Five ready-to-run activities with step-by-step instructions
- Safety, allergy, and accessibility considerations
- Key Takeaways
- What process art taught me about letting go
- Craftybynumbers kits: a low-prep option for family art nights
- Useful sources
- FAQ
What makes an art activity developmentally appropriate?
Choosing the right activity is less about finding something “educational” and more about matching the experience to where a child actually is. Montessori Art’s guidance on age-appropriate materials outlines several practical criteria worth running through before you set anything up.
Selection criteria:
- Developmental goal. Every activity should target something real: grip strength, color recognition, emotional expression, or turn-taking. Without a goal, you’re just keeping a child busy.
- Motor demands. Fine motor skills develop gradually. A 2-year-old cannot reliably use scissors or thin brushes. Match the tool to the hand.
- Sensory load. Some children are sensitive to wet, sticky, or strongly scented materials. Offer alternatives (gloves, dry textures) before assuming a child “doesn’t like art.”
- Attention span. Toddlers have a short focused engagement span, and preschoolers can sustain attention much longer, though exact durations vary. Plan accordingly — short setups, easy cleanup.
- Materials safety. Look for non-toxic labels and ASTM D-4236 certification on all paints, glues, and clays. Small parts are a choking hazard for children under 3.
- Cultural relevance. Art that reflects a child’s home, family, and community signals belonging. Include patterns, colors, and imagery from diverse traditions.
- Opportunity for choice. Even a toddler should be able to pick a color or decide where to put a sticker. Choice builds agency and sustains engagement.
Two quick readiness checks before you start:
- Can the child hold or manipulate the primary tool without frustration for at least 30 seconds?
- Is every material in the activity non-toxic and sized so it cannot be swallowed?
If both answers are yes, you’re ready to go.
Process art versus product art: which one should you choose?
The distinction matters more than most parents realize. NAEYC’s research on process-focused art draws a clear line between the two approaches and makes a strong case for leading with process.
Process-focused art is open-ended exploration where the child decides what to make, how to make it, and when it’s done. Product-focused art follows a model or template — think a pre-cut turkey shape to color in, or a step-by-step directed drawing.
| Dimension | Process art | Product art |
|---|---|---|
| Purpose | Exploration, expression, experimentation | Skill practice, following directions |
| Adult role | Offer materials, observe, ask open questions | Demonstrate, guide steps, check for accuracy |
| Child outcome | Language, problem-solving, emotional resilience | Fine motor practice, sequencing, self-regulation |
| Typical example | Free easel painting with mixed colors | Cutting and gluing a template butterfly |
When to choose process art: almost always for children under 6. Open-ended experiences give richer opportunities for expressive language and cognitive flexibility than template projects do. A child who mixes red and blue and discovers purple has just run a small experiment.
When product art earns its place: when a specific motor skill needs practice (cutting along a line, tracing shapes) or when a child is learning to follow multi-step directions. Even then, keep the template loose and the child’s choices visible.
Pro Tip: Offer interesting tools alongside standard brushes — toothbrushes, sponge rollers, or cotton swabs. NAEYC notes that novel tools extend engagement and invite children to think about how different surfaces make different marks.
Age-by-age guide to art activities
Infants (0–12 months)
Developmental goals:
- Sensory exploration through touch, sight, and movement
- Early cause-and-effect understanding (I press, something happens)
- Hand-eye coordination through reaching and grasping
Activities:
- Edible finger paint (pureed sweet potato or beet on a tray): Materials: food-grade puree, high chair tray. Adaptation: place a zip-lock bag over the tray for a no-mess version.
- Crinkle texture collage (supervised tummy time): Materials: textured fabric scraps, crinkle paper. Adaptation: tape materials to a flat surface so baby can bat at them.
Safety note: Infants require constant within-arm-reach supervision. Every material must be food-safe or non-toxic, with no pieces smaller than a golf ball.
Young toddlers (12–24 months)
Developmental goals:
- Large-muscle mark-making (whole-arm movements)
- Sensory tolerance and curiosity
- Parallel play alongside a caregiver
Activities:
- Finger painting on butcher paper (floor level): Materials: washable non-toxic paint, large paper. Adaptation: tape paper to a wall for vertical mark-making, which builds shoulder strength.
- Sponge stamping: Materials: cut sponges, shallow paint trays. Adaptation: use larger sponge pieces for children with limited grip; smaller cut shapes for those ready for more precision.
Safety note: Toddlers still mouth materials. Use only ASTM D-4236 certified, washable paints and supervise continuously.
For a multicultural adaptation, offer sponges cut into shapes from traditional textiles (diamonds, zigzags) found in West African kente or Navajo weaving patterns. Even at this age, shape recognition begins.
Older toddlers (2–3 years)
Developmental goals:
- Beginning intentional mark-making and scribbling
- Vocabulary building through color and texture talk
- Early self-expression and emotional labeling
Activities:
- Watercolor on wet paper: Materials: watercolor set, thick paper, water cup. Adaptation: pre-wet the paper for younger toddlers so colors bloom immediately, which is more rewarding.
- Collage with torn paper: Materials: magazine pages, glue sticks, cardstock. Adaptation: pre-cut shapes for children with limited fine motor control; let older toddlers tear their own.
- Nature printing: Materials: leaves, flat flowers, washable paint, paper. Adaptation: press leaves under a rolling pin with the child for a shared sensory experience.
Safety note: Scissors are not yet appropriate. Glue sticks are safer than liquid glue at this stage.
Preschool (3–5 years)
Developmental goals:
- Representational drawing (shapes become people, houses, suns)
- Cooperative art and turn-taking
- Narrative building through art (“This is my family”)
Activities:
- Watercolor resist with white crayon: Materials: white crayon, watercolor paints, paper. Adaptation: use oil pastels for children who need more visible marks before painting.
- Clay or homemade dough exploration: Materials: air-dry clay or salt dough, simple tools. Adaptation: add scent (lavender, cinnamon) for sensory-seeking children.
- Fruit stamping: Materials: halved citrus, apples, or bell peppers; washable paint. Adaptation: pre-cut fruit for safety; let children choose colors and placement freely.
Safety note: Introduce child-safe scissors with supervision. Check for food allergies before fruit stamping.
For a multicultural extension, LibreTexts guidance on culturally appropriate art recommends incorporating patterns and imagery from children’s home cultures — try Hmong story cloth patterns, Mexican papel picado shapes, or Japanese shibori-inspired dyeing with coffee filters.
Early primary (5–7 years)
Developmental goals:
- Detailed representational art and planning ahead
- Following multi-step processes independently
- Connecting art to storytelling and personal identity
Activities:
- Shaving cream marbling: Materials: shaving cream, food coloring or liquid watercolor, cardstock, a straight edge. Adaptation: use whipped cream for children with sensory sensitivities to foam.
- Salt painting: Materials: liquid watercolor or diluted food coloring, white glue, salt, cardstock. Adaptation: pre-draw the glue lines for children with limited fine motor control.
- Collaborative mural: Materials: large butcher paper, mixed media. Adaptation: assign sections by interest (sky, ground, people) to support children who feel overwhelmed by blank space.
Safety note: Children at this age can use standard child scissors and thin brushes independently, but still need a nearby adult for glue guns or any heat-based tools.
Pairing art with personalized books that unlock creativity gives early primary children a narrative prompt before they paint or draw — a simple way to connect literacy and visual art in the same session.
How to set up an art area that children actually use
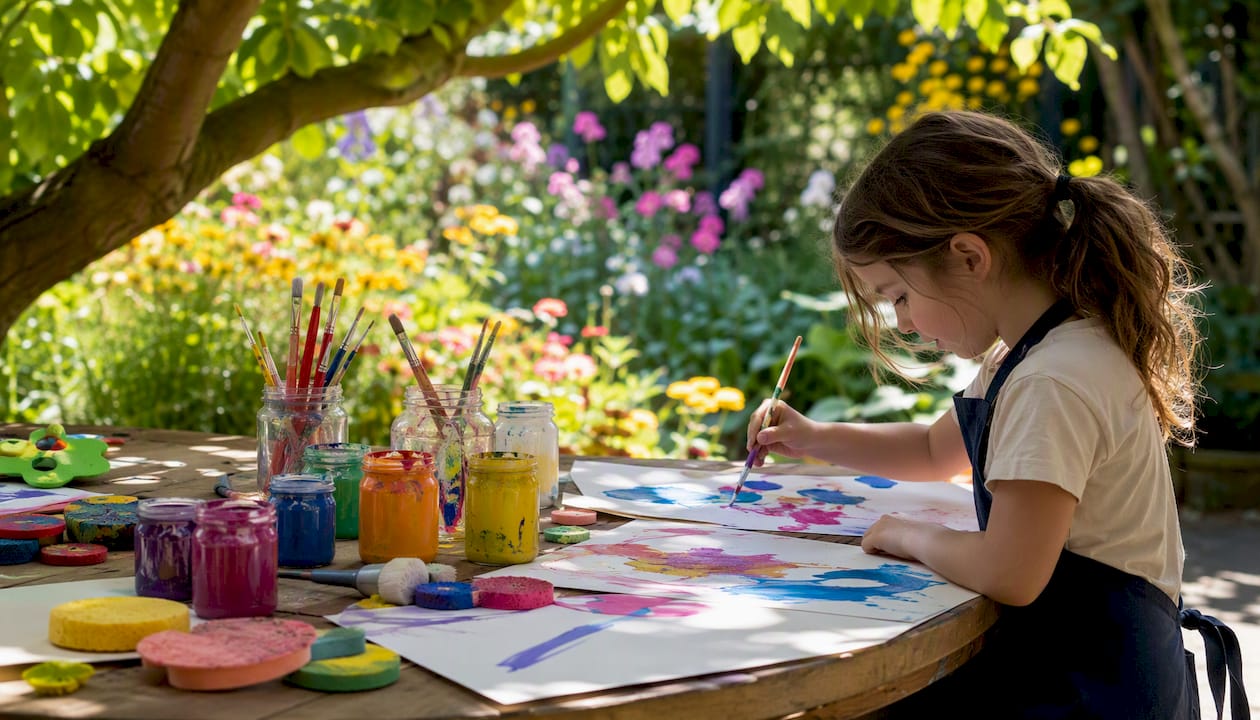
The setup does more work than most caregivers expect. NAEYC’s process art setup guidance recommends organizing every art station around three elements: a base (what you work on), a medium (what you apply), and tools (what you apply it with). When children can see all three clearly, they make choices faster and stay engaged longer.
Supply checklist by age band:
| Age band | Base | Medium | Tools | Safety note |
|---|---|---|---|---|
| 0–12 months | High chair tray, butcher paper | Edible puree, finger paint | Hands only | Food-safe only; no small parts |
| 12–24 months | Large butcher paper, cardboard | Washable finger paint | Sponges, hands | ASTM D-4236 certified; no brushes with loose ferrules |
| 2–3 years | Cardstock, watercolor paper | Watercolor, glue stick | Thick brushes, sponge stamps | No scissors; non-toxic glue |
| 3–5 years | Mixed paper, canvas board | Tempera, watercolor, clay | Child brushes, child scissors | Supervise scissors; check food allergies |
| 5–7 years | Canvas, cardstock, fabric | Acrylic (washable), mixed media | Thin brushes, child scissors, rollers | Adult nearby for any heat tools |
Simple station layout (text diagram):
[ BASE: paper/canvas on table or easel ]
[ MEDIUM: paint cups or watercolor pan, centered ]
[ TOOLS: brushes/sponges to the right; water cup to the left ]
Mess management checklist:
- Cover the table with a plastic tablecloth or shower curtain liner
- Use washable paints whenever possible
- Set up outdoors when weather allows — hose cleanup takes 2 minutes
- Keep a damp cloth within reach for quick hand wipes mid-session
- Store paints upright; if acrylic paint dries out, Revive Dry Paints can restore consistency without waste
When a pre-packaged kit makes sense: For families who want less prep and predictable cleanup, age-labeled kits remove the guesswork. Craftybynumbers kits like Ivory Essence and Garden of Dreams come with matched paints, a numbered canvas, and brushes — everything already calibrated. The Premium Paint Brushes (Set of 10) work well for children ages 6 and up who are ready for finer detail work.
How to scaffold and adapt activities for every child
Scaffolding means adjusting the challenge level so a child is always slightly stretched but never stuck. Three techniques cover most situations.
1. Model with minimal words. Show the action once (dip, press, lift) without narrating every step. Children imitate more freely when they aren’t waiting for the next instruction.
2. Offer choice points. “Do you want the big brush or the little one?” gives a child agency without opening the activity to chaos. Choice points also reveal preferences that help you plan the next session.
3. Reduce motor demands. Pre-tear paper, pre-cut shapes, or switch to a thicker brush. The goal is creative engagement, not fine motor endurance.
Inclusion checklist:
- Sensory adjustments: offer gloves, dry alternatives, or scent-free materials for sensory-sensitive children
- Alternative grips: foam tubing over brush handles, weighted tools, or adapted scissors for children with limited hand strength
- Visual supports: a photo sequence of the activity steps posted at eye level
- Peer pairing: match a child who needs support with a willing partner for shared tasks like collage or stamping
For a child with limited fine motor control, a collage becomes accessible by pre-cutting shapes into larger pieces and using a glue stick instead of liquid glue. For a dual-language learner, narrate color and texture in both languages during the activity — “rojo/red, suave/soft” — which builds vocabulary in both directions simultaneously.
Pro Tip: Run a 3-minute observation before changing materials: note one motor skill you see (pincer grip, whole-hand grasp) and one piece of language the child uses. Those two data points tell you whether to offer a more complex tool or stay with what’s working. NAEYC recommends this kind of brief documentation as a low-effort way to track growth and start conversations with families.
Five ready-to-run activities with step-by-step instructions
These five activities appear consistently across The Artful Parent’s top activity lists and PBS Parents’ art ideas because they are repeatable, adaptable, and genuinely engaging for children.
1. Watercolor resist
Materials: White crayon or oil pastel, watercolor paints, thick paper, water cup, brush. Steps:
- Draw a design or shapes with the white crayon (invisible on white paper).
- Paint over the entire paper with watercolor.
- Watch the crayon marks “resist” the paint and appear.
- Let dry flat.
Learning goals: Color mixing, cause-and-effect, fine motor control. Adaptation: Use oil pastels for toddlers who need visible marks; let older children write words or names to reveal. Setup: Indoor. Wipe brushes between colors; let paper dry on a flat surface.
2. Fruit and vegetable stamping
Materials: Halved citrus, apples, or bell peppers; washable tempera paint; shallow trays; paper. Steps:
- Pour a thin layer of paint into each tray.
- Press the cut fruit face-down into the paint.
- Press firmly onto paper, then lift straight up.
- Repeat with different fruits and colors.
- Let dry.
Learning goals: Pattern recognition, cause-and-effect, sensory exploration. Adaptation: For toddlers, hold the fruit together with the child (hand-over-hand). Older children can arrange stamps into intentional patterns. Setup: Indoor or outdoor. Check for citrus allergies. Adult pre-cuts all fruit.
3. Nature collage
Materials: Collected leaves, petals, twigs, seeds; cardstock; white glue or glue stick; optional: watercolor wash. Steps:
- Collect natural materials on a short outdoor walk.
- Arrange materials on cardstock before gluing — encourage the child to try different layouts.
- Glue pieces down.
- Optional: add a light watercolor wash over the top once dry.
Learning goals: Sorting and classification, fine motor control, connection to the natural world. Adaptation: For children with limited grip, use a glue stick and larger materials. Extend for older children by asking them to create a scene or tell a story about their collage. Setup: Outdoor collection, indoor assembly. Check for plant allergies.
4. Salt painting
Materials: White glue, cardstock, table salt, liquid watercolor or diluted food coloring, droppers or brushes. Steps:
- Draw a design with white glue directly on cardstock.
- Immediately pour salt over the wet glue; shake off excess.
- Let the salt-glue layer dry for 10 minutes.
- Drop liquid watercolor onto the salt with a dropper or thin brush.
- Watch the color spread through the salt crystals.
Learning goals: Cause-and-effect, color mixing, patience and delayed gratification. Adaptation: Pre-draw glue lines for children with limited motor control. Older children can plan geometric or nature-inspired designs before starting. Setup: Indoor. Cover surface well — salt scatters. Supervise closely with younger children (salt is not a choking hazard but should not be eaten in quantity).
5. Clay and homemade dough exploration
Materials: Air-dry clay or homemade salt dough (1 cup flour, ½ cup salt, ½ cup water), simple tools (plastic knife, rolling pin, cookie cutters). Steps:
- Give each child a palm-sized ball of clay or dough.
- Explore freely: poke, roll, flatten, pinch.
- Introduce one tool at a time (rolling pin first, then cutters).
- Encourage children to name what they’re making — or not. Both are fine.
- Air-dry finished pieces or return dough to an airtight container.
Learning goals: Fine motor strength, sensory tolerance, imaginative play and narrative. Adaptation: Add lavender or cinnamon to the dough for sensory-seeking children. For children with limited hand strength, pre-soften the clay and offer a wooden mallet for pounding. Setup: Indoor. Cover table; have damp cloths ready. Salt dough is non-toxic but not edible.
Safety, allergy, and accessibility considerations
A short checklist covers most of the risk in a typical art session.
Safety checklist:
- Verify ASTM D-4236 non-toxic certification on all paints, glues, and clays before use
- Remove any material smaller than 1.75 inches in diameter from sessions with children under 3
- Use child-safe scissors (rounded tip, spring-loaded) and introduce them only after age 3 with supervision
- Wipe spills immediately to prevent slips, especially on hard floors
- Store all materials out of reach between sessions
Allergy guidance:
- Avoid food-based stamping (fruit, vegetables) without first checking for food allergies with caregivers
- Substitute non-food stamps (foam shapes, sponges) for any child with a known food allergy
- Use fragrance-free, dye-free materials for children with skin sensitivities
- Run an allergy check at the start of every new school year or group session — not just at enrollment
Accessibility notes:
- Offer foam tubing over brush handles for children with limited grip strength
- Provide visual step-by-step photo cards for children who benefit from visual supports
- Break longer activities into 2–3 shorter segments for children with attention or sensory regulation challenges
- Seat children at a table height where their feet are flat on the floor — posture affects fine motor control more than most people realize
Age-specific supervision: Infants and toddlers require within-arm-reach supervision at all times. Preschoolers (3–5) need an adult present and engaged, not just nearby. Early primary children (5–7) can work more independently but still need an adult available for tool use and cleanup.
Peer-reviewed research on arts and child development and NEA research on social-emotional benefits both underscore that the benefits of art accumulate when activities are safe, consistent, and matched to the child’s stage — not when they are elaborate or expensive.
Key Takeaways
Process-focused, age-matched art activities build fine motor skills, expressive language, and emotional resilience when materials are safe, setups are intentional, and children have genuine choices.
| Point | Details |
|---|---|
| Match activity to developmental stage | Check motor demands, attention span, and material safety before setting up any activity. |
| Prioritize process over product | Open-ended exploration builds language and problem-solving more than template projects do, especially under age 6. |
| Use the base + medium + tools setup | Arranging materials in three visible categories increases child engagement and supports independent choice. |
| Scaffold for inclusion | Reduce motor demands, offer visual supports, and use alternative grips to make activities accessible to every child. |
| Craftybynumbers kits for older children | Kits like Ivory Essence and Garden of Dreams offer a low-prep, structured option for children ages 6 and up and family art nights. |
What process art taught me about letting go
The hardest thing for most adults in an art session is not the mess. It’s the silence when a child makes something that looks “wrong.” A preschooler who paints her dog purple and her sky brown is not making a mistake. She’s making a decision, and that decision is the whole point.
The research backs this up clearly. NAEYC’s process art framework and the broader evidence base on arts and development both point to the same conclusion: children who are given genuine creative freedom in art sessions develop stronger expressive language, more flexible thinking, and better emotional regulation than children who spend most of their art time following a model. The purple dog is not a detour from learning. It is the learning.
Craftybynumbers has seen this play out with families who start with a structured kit and end up using it as a springboard — the numbered canvas gives a child enough confidence to pick up a brush, and then the curiosity takes over. That on-ramp matters. Not every child arrives at art ready to face a blank page, and there’s no shame in starting with a little structure before opening it up.
Craftybynumbers kits: a low-prep option for family art nights
When you want a creative session without spending 45 minutes gathering supplies, a well-designed kit closes the gap between intention and action. Craftybynumbers paint-by-numbers kits come with everything matched and ready: a numbered canvas, pre-sorted acrylic paints, and brushes sized for the work. For children ages 6 and up, and for mixed-age family nights, that predictability is genuinely useful.

The Ivory Essence and Garden of Dreams kits work well as a first structured painting experience for older children, with enough detail to feel satisfying and enough simplicity to stay frustration-free. Blossoming Cottage suits families who want a slightly more complex scene to work on together over multiple sessions. For extra practice canvases, Extra Painting lets children repeat the process and watch their technique improve. The Premium Paint Brushes (Set of 10) are a solid standalone upgrade for any child who has outgrown chunky toddler brushes, and Revive Dry Paints keeps your paint supply usable longer. Browse the full range at Craftybynumbers and find the kit that fits your family’s next art night.
Useful sources
These are the primary sources behind this guide. Each one is worth bookmarking if you plan art activities regularly.
- How Process-Focused Art Experiences Support Preschoolers | NAEYC
- What Will We Make? Using Process Art to Spark Preschoolers’ Development | NAEYC
- PMC article: arts and child development (open-access review)
- Arts participation and early childhood social and emotional benefits | NEA (arts.gov)
- Creating developmentally, culturally, and linguistically appropriate art learning experiences | LibreTexts
- How to Teach Age-Appropriate Art Activities for Children — Montessori Art
- Top 10 art activities for kids | The Artful Parent
- Art activities and ideas for kids | PBS Parents
FAQ
Which art activity is most appropriate for toddlers?
Finger painting and sponge stamping with washable, ASTM D-4236 certified paint are the most developmentally appropriate choices for toddlers ages 1–3. Both activities require no fine motor precision, support sensory exploration, and produce immediate, satisfying results.
What are examples of developmentally appropriate art activities?
Developmentally appropriate art activities include edible finger painting for infants, watercolor on wet paper for older toddlers, fruit stamping and collage for preschoolers, and salt painting or watercolor resist for early primary children. Each matches the child’s motor skills, attention span, and safety needs at that stage.
What are the best art activities for kids ages 3–5?
Preschoolers thrive with watercolor resist (white crayon under paint), clay or homemade salt dough exploration, and nature collage. These activities are open-ended enough for genuine creative choice while still being simple to set up and clean up.
What are the main types of art activities for young children?
The core categories are drawing and mark-making, painting (finger, brush, watercolor), printmaking and stamping, collage and mixed media, and three-dimensional work like clay or dough. Process-focused versions of each type support the broadest range of developmental goals, from fine motor control to expressive language.
When are paint-by-numbers kits appropriate for children?
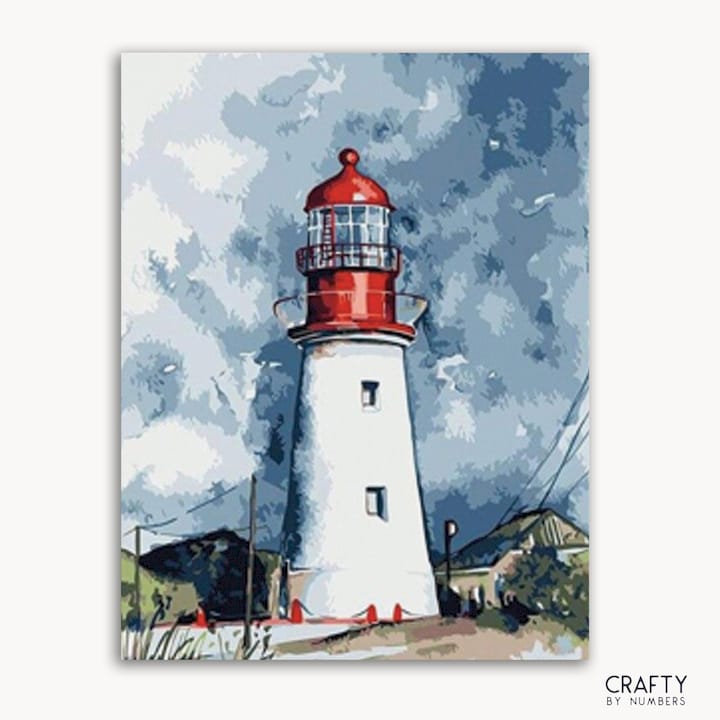
Paint-by-numbers kits are generally suitable for children ages 6 and up, when they can follow numbered sections, manage a thin brush, and sustain attention for longer sessions. Craftybynumbers kits like Ivory Essence and Garden of Dreams are designed to ease beginners into painting with clear structure and matched supplies.
0 comments