

To keep acrylics usable between sessions, cover mixed paints with plastic wrap pressed directly onto the paint surface for same-day use, transfer mixes to airtight jars or a Sta-Wet-style system for 1–3 days, and store tubes cap-down at a slight angle for long-term access. Acrylics can dry in as little as 20 minutes on a palette under typical indoor conditions, so acting fast at session end matters more than most hobbyists realize. Wiping threads clean before resealing is the single habit that prevents most storage failures.
TL;DR: Cover mixed paint immediately, seal it tight, and store tubes cap-down.
- Same day: Press plastic wrap onto paint piles or use a wet palette with a damp sponge
- 1–3 days: Transfer mixes to airtight jars or small candle tins; press plastic onto the surface before sealing
- 3+ days: Use a Sta-Wet-style sealed palette system or well-sealed jars stored in a cool, dry spot
Table of Contents
- What’s the fastest method to store acrylic paints between sessions?
- How do you store mixed acrylics between sessions step by step?
- Which storage method actually works best for hobbyists?
- How should you store acrylic paint tubes and unopened paints?
- Can retarders and slow-drying mediums help you keep paints workable longer?
- What went wrong? Diagnosing and salvaging poorly stored acrylic paint
- Key Takeaways
- The habit nobody talks about enough
- Supplies that make session handoffs easier
- Useful sources
- FAQ
What’s the fastest method to store acrylic paints between sessions?
The right method depends entirely on how long you’ll be away from your palette.
Same session break (minutes to hours)
- Wet palette with a damp sponge underneath keeps colors workable without any transfer
- Cling film pressed directly onto paint piles blocks air contact fast and costs almost nothing
- A sealed Ziploc bag with a damp paper towel inside works in a pinch
Overnight/next-day (24–48 hours)
- Cling film plus a damp sponge inside a covered tray keeps paints workable all day and often into the next morning
- Airtight jars with plastic pressed onto the paint surface extend usability to 24–48 hours
- A commercial wet palette (Sta-Wet style) with its lid sealed handles overnight storage reliably
Short-term multi-day (3–7 days)
- Airtight jars or small candle tins with minimal headspace outperform larger containers because less air means slower drying
- Sta-Wet-style systems with a sealed lid and damp sponge layer hold mixes for several days
Longer storage (weeks and beyond)
- Factory-sealed tubes stored cap-down at a 15–30° angle in a paint organizer stand stay ready for months
- Label and date any transferred mixes so you know what you’re reopening
The tradeoff is simple: convenience peaks with plastic wrap (zero cleanup, zero cost), while duration peaks with airtight jars or a dedicated wet palette system.
How do you store mixed acrylics between sessions step by step?
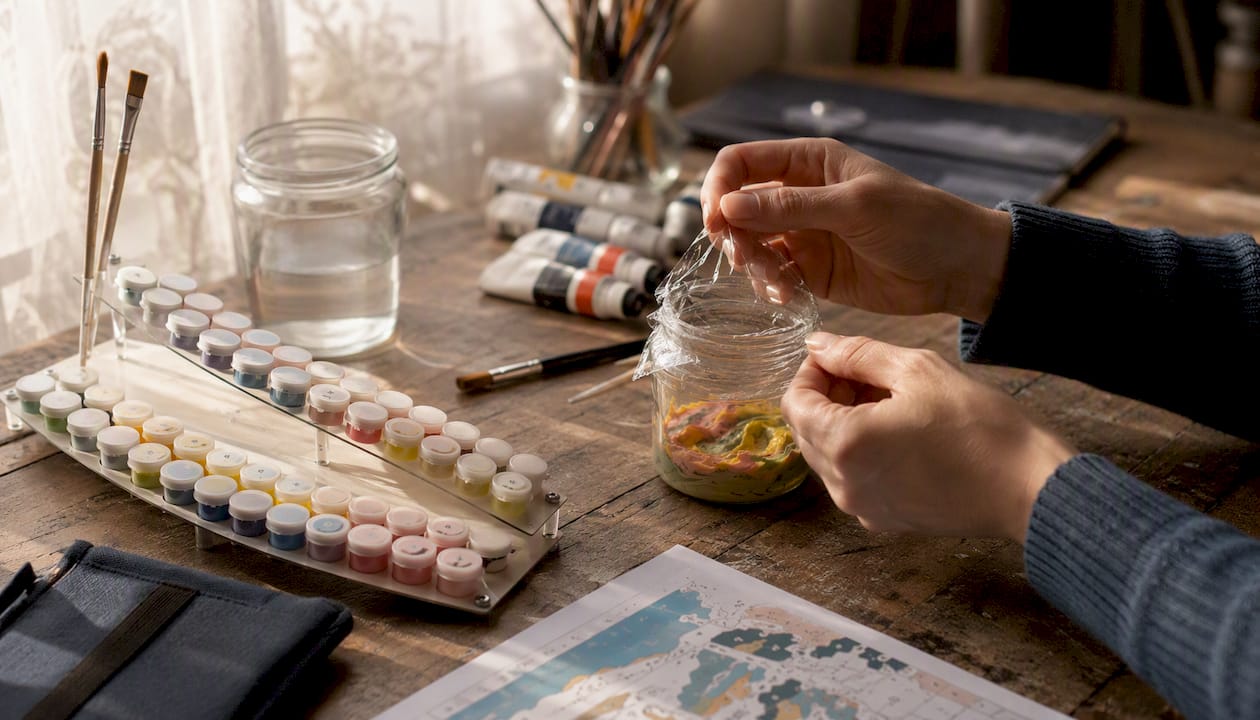
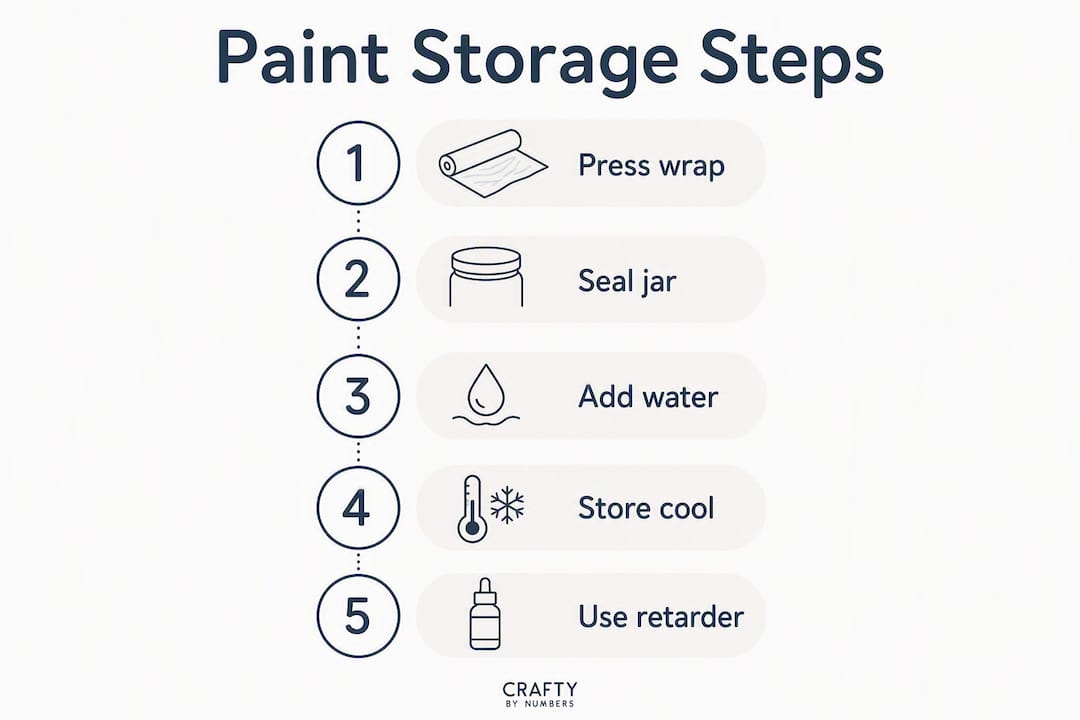
The single best procedure: at session end, scrape concentrated paint piles onto freezer paper or into a wet palette, press plastic wrap directly onto every pile, and seal the whole tray. For anything you want to keep longer than a day, transfer to small airtight jars.
Materials you’ll need: wet palette, freezer paper, cling film, small airtight jars or candle tins, a damp sponge, Ziploc bags, a marker for labeling.
- Scrape and consolidate leftover paint into tighter piles on your palette or onto a sheet of freezer paper. Spreading it thin accelerates drying.
- Press plastic wrap directly onto the paint surface. Smooth out air bubbles as you go. Direct contact is the key — any gap lets air in and drying begins.
- Add a damp sponge inside the container or palette before sealing. The moisture in the air around the paint slows evaporation significantly.
- Seal the container tightly. For jars, wipe the threads with a damp cloth before closing the lid. Dried residue on threads is the leading cause of caps that won’t seal properly.
- Label with the date and a quick color note (“warm shadow mix, Oct 12”). You’ll thank yourself when you reopen it three days later.
- Store in a cool, dry spot away from direct sunlight and heat sources.
To revive slightly thickened paint: add a few drops of water or a slow-drying medium, then work it with a palette knife until the consistency returns. If the paint has formed a rubbery skin but the layer underneath is still moveable, peel the skin off and test the paint below before adding anything.
Pro Tip: Press a small square of plastic wrap directly onto the surface inside each jar before screwing on the lid. This double barrier — plastic on paint, then lid — cuts headspace contact dramatically and keeps medium-rich mixes from skinning over.
Which storage method actually works best for hobbyists?
Wet palettes, Sta-Wet systems, plastic wrap, and airtight jars each solve a different problem. Here’s how they compare.
| Method | Timeframe | Cost | Ease | Contamination risk | Best for |
|---|---|---|---|---|---|
| Plastic wrap / cling film | Same day to 24 hrs | Very low | Very easy | Low | Quick breaks, no cleanup |
| Wet palette + damp sponge | Same day to 48 hrs | Low | Easy | Low | Active sessions, color consistency |
| Sta-Wet-style sealed system | 1–3 days | Medium | Easy | Low | Regular painters, multi-day projects |
| Airtight jars / candle tins | 3–7 days | Low to medium | Moderate | Low if clean | Pre-mixed batches, custom colors |
| Freezer paper + sealed bag | Same day to 24 hrs | Very low | Easy | Low | Travel, minimal kit |
A few things the table doesn’t capture: mixed colors dry faster than factory-sealed paint and need more aggressive protection. Candle tins specifically outperform larger jars for short-term mixed-paint storage because their small, consistent headspace limits evaporation. And wet palettes shine for color consistency during a session, not just preservation.
- Wet palette: best if you’re painting regularly and want colors to stay mixable
- Airtight jars: best for custom mixes you want to reuse across multiple sessions
- Plastic wrap: best when you need a fast, zero-prep solution right now
How should you store acrylic paint tubes and unopened paints?
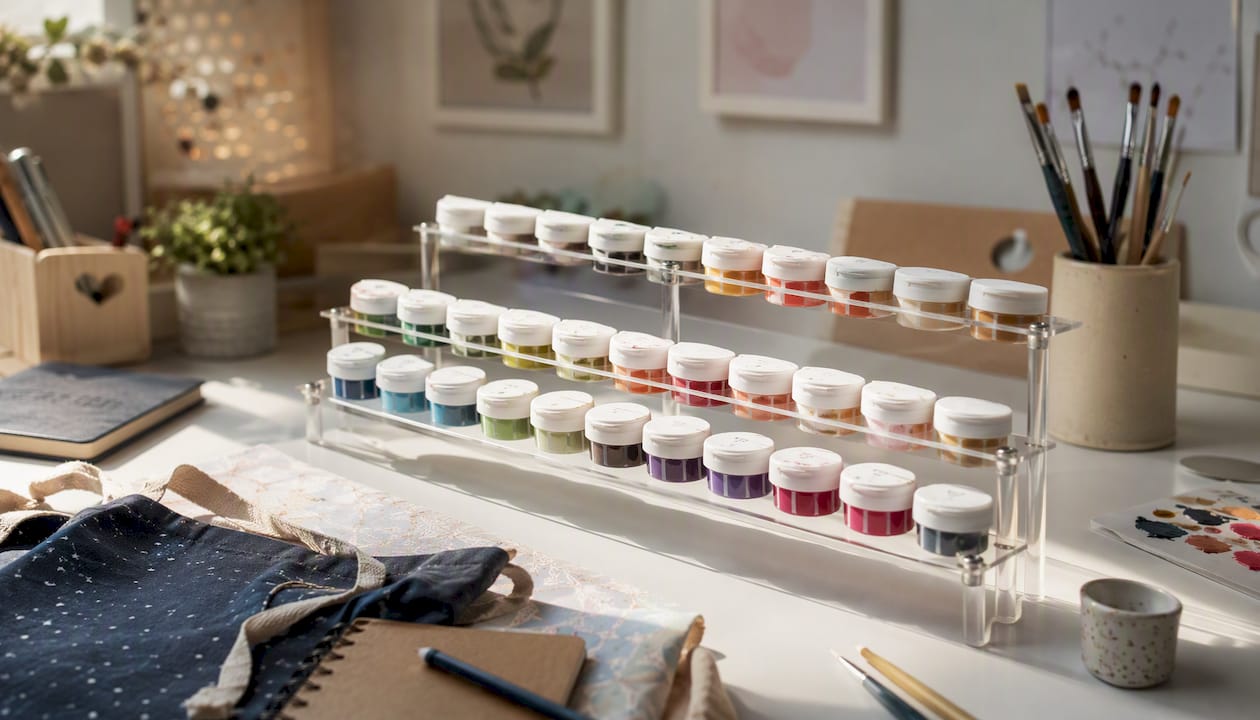
One rule covers most of it: store tubes cap-down at a slight angle in a dedicated rack. This keeps paint from collecting in the neck, which is exactly where it dries and seals the cap shut.
Do’s:
- Wipe the tube threads and lid threads with a damp cloth before every seal
- Press a small square of plastic wrap over the paint surface inside open jars before closing
- Tap the base of a jar gently to settle paint and eliminate air pockets
- Label and date any opened or mixed paint
- Store in a cool, dry place, ideally between 65°F and 75°F
Don’ts:
- Don’t freeze paints. Freezing causes the polymer binders to break down, and the damage is often permanent
- Don’t leave caps loose, even briefly. Twenty minutes is enough for a skin to form
- Don’t store tubes cap-up long-term. Paint migrates to the neck and dries there
- Don’t rely on the refrigerator for anything beyond very short-term use. The temperature swing when you take paint in and out creates condensation inside the tube, which accelerates separation
The leading cause of paint failure is dried residue on tube or jar threads. Wiping threads before resealing takes five seconds and prevents most of the stuck-cap, cracked-seal problems hobbyists run into.
A paint organizer stand that holds tubes at the right angle solves the cap-down storage problem without any DIY rigging. It also makes color selection faster, which matters when you’re mid-session and don’t want to lose momentum.
| Storage condition | Recommended range / action |
|---|---|
| Ideal temperature | cool and dry environment |
| Tube tilt (cap-down) | slight angle |
| Palette open time before drying | typically as little as 20 minutes under indoor conditions |
| Plastic wrap method (jars) | short-term (up to a couple days) |
| Airtight jar method | several days |
Can retarders and slow-drying mediums help you keep paints workable longer?
Yes, with a caveat: small amounts extend open time noticeably, but more is not better. Over-thinning with water dilutes pigment and weakens the paint film. Too much retarder delays drying so long that layers won’t cure properly for days.
The options break down like this:
- Water: free and always available, but it dilutes pigment and reduces adhesion if you exceed roughly 30% of the paint volume
- Commercial retarders: purpose-built to slow drying without the dilution problem; follow the manufacturer’s dosing, usually a few drops per mix
- Slow-drying mediums and gel mediums: products like Craftybynumbers’ Acrylic Medium Gloss Gel adjust consistency and extend open time while adding body and gloss; useful when you want to slow drying and improve flow at the same time
Start with the minimum amount that achieves the result you need. Test on a scrap piece first, especially with gel mediums, since they change the paint’s texture and finish as well as its drying speed.
Pro Tip: Combine a small amount of retarder with a wet palette for multi-hour sessions. The retarder slows drying in the mix; the wet palette keeps the surface from skinning. Together, they extend workable time far longer than either method alone.
What went wrong? Diagnosing and salvaging poorly stored acrylic paint
Most storage failures fall into one of four categories, and three of them are recoverable.
Symptom checklist:
- Skin or film on top: peel it off carefully and test the paint underneath. If it’s still fluid, it’s usable
- Thickened but moveable: add a few drops of water or medium, work it with a palette knife, and test consistency on a scrap surface
- Rubbery solid throughout: discard. Once the polymer has fully cured, no amount of water or medium will reverse it
- Sour smell or visible mold: discard immediately. Contaminated paint can affect adhesion and finish on your canvas
Stuck caps and dried threads: soak the cap area in warm water for a few minutes, then gently twist. If it still won’t budge, try carefully prying with a palette knife wrapped in a cloth. Once open, clean the threads thoroughly before resealing. The fix for next time is always the same: wipe threads before you close the tube.
Pro Tip: Don’t throw away small leftover mixes. Brush them onto a gessoed scrap panel or a “slop board” and let them dry. You get a free color reference, a texture sample, and zero waste. Some of the most useful color notes come from accidental mixes you’d otherwise toss.
Turning small leftovers into an intentional slop board or sample panel converts waste into a creative resource, reducing the pressure to save every last bit of mixed paint.
For more on common beginner painting mistakes that lead to storage problems in the first place, Craftybynumbers has a practical guide worth bookmarking.
Key Takeaways
Pressing plastic wrap directly onto mixed paint and storing tubes cap-down at a slight angle are the two habits that prevent most acrylic paint waste between sessions.
| Point | Details |
|---|---|
| Same-day coverage | Press cling film directly onto paint piles or use a wet palette with a damp sponge to keep colors workable for hours. |
| Multi-day jar storage | Transfer mixes to airtight jars or candle tins, press plastic onto the surface, wipe threads, and seal tightly for up to 7 days. |
| Tube orientation | Store tubes cap-down at a 15–30° angle to prevent paint from drying in the neck and sealing the cap. |
| Retarder use | Add small amounts of retarder or slow-drying medium at mix time; combine with a wet palette for multi-hour sessions. |
| Craftybynumbers supplies | A paint organizer stand holds tubes at the correct cap-down angle; Acrylic Medium Gloss Gel extends open time for active sessions. |
The habit nobody talks about enough
Most storage guides focus on the container. The real problem is the gap between finishing a session and actually sealing things up. That five-minute window where you’re cleaning brushes and the paint is sitting open on the palette? That’s where most of the waste happens.
The painters who waste the least paint aren’t using the most expensive systems. They’ve built a closing ritual: wipe threads, press plastic, cap down, label it. It takes under two minutes and it’s the difference between opening fresh paint next session and scraping a dried skin off a jar.
There’s also something worth saying about the refrigerator myth. Plenty of hobbyists assume the fridge is the obvious solution for keeping paint fresh. It does slow drying slightly, but the condensation risk when you bring cold paint back to room temperature, combined with the real danger of accidentally freezing it, makes it a worse option than a simple airtight jar at room temperature. The jar wins.
For group sessions or family painting nights, these habits matter even more. When multiple people are working from the same palette, paint gets left uncovered constantly. A few small covered containers and a roll of cling film on the table solves that problem before it starts. Craftybynumbers has a full guide on hosting a paint by numbers party that covers exactly this kind of multi-painter setup.
Supplies that make session handoffs easier
Knowing the right techniques is half the job. Having the right tools within reach makes it automatic.
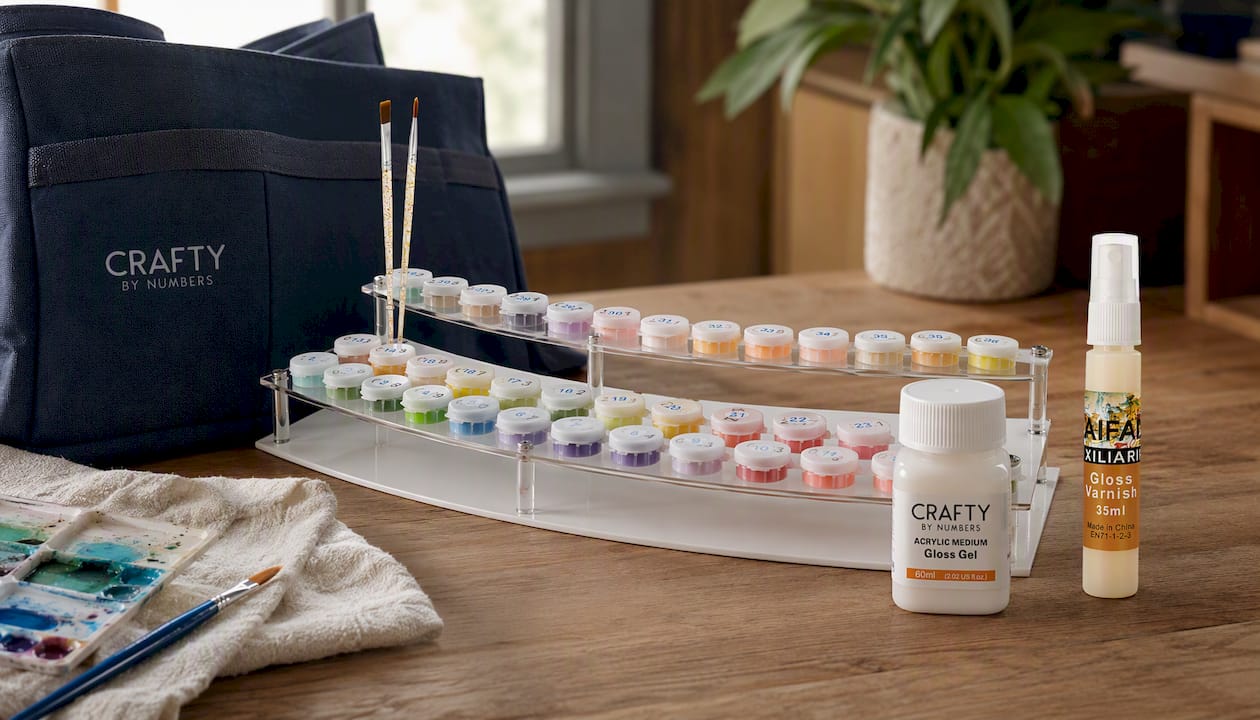
Craftybynumbers carries three supplies that fit directly into the workflows covered here. The Paint Organizer Stand holds tubes at the cap-down angle that prevents neck-drying, keeps your colors visible and accessible, and works for both tube and small bottle formats. The Acrylic Medium Gloss Gel extends open time and improves flow for active sessions, and it doubles as a finishing medium for completed sections. Gloss Varnish seals finished areas of your canvas so you can store a partially completed painting without worrying about the dried layers. All three are designed to work with the acrylic paints included in Craftybynumbers kits. Browse the full range and pick up what fits your setup at craftybynumbers.com.
Useful sources
A few resources worth reading if you want to go deeper on any of these methods:
- Art Noise: How to store acrylic paint so it lasts longer — jar storage steps, thread-wiping technique, and when to discard
- Art and Success: How do I keep my paints wet between sessions? — candle tin method, Sta-Wet systems, and the slop-board approach to reducing waste
The primary enemy of acrylic paint storage is air. Implementing multiple barrier methods — plastic on the surface, clean threads, tight lid — compounds the protection and keeps mixes usable far longer than any single technique alone.
For home studio organization ideas that translate well to small craft spaces, Cozee Bay’s storage organization guide has some practical compact-space solutions worth adapting.
FAQ
Can you save acrylic paint for the next day?
Yes. Press plastic wrap directly onto the paint surface, add a damp sponge inside a sealed container, and store in a cool spot. This keeps most mixes workable for 24–48 hours.
Is it okay to store acrylic paint upside down?
For tubes, yes — storing cap-down at a 15–30° angle is actually recommended because it prevents paint from drying in the neck and sealing the cap shut.
What’s the best way to store acrylic paint between sessions?
For same-day use, a wet palette with a damp sponge is the most reliable method. For multi-day storage, transfer mixes to small airtight jars, press plastic onto the paint surface, wipe the threads, and seal tightly.
How long should you wait between coats of acrylic paint?
Acrylics can feel dry to the touch in as little as 20 minutes under typical indoor conditions, but a full cure for layering usually takes longer depending on paint thickness and ventilation. Thin layers are generally safe to paint over within 20–30 minutes; thicker applications need more time.
How do you revive dried acrylic paint?
If the paint has a skin on top but is still fluid underneath, peel the skin off and add a few drops of water or medium to restore consistency. Paint that has cured to a rubbery solid cannot be revived and should be discarded.
0 comments